Get in Touch with GUANGQI


All sports lighting projects begin the same way: how much light is needed on that playing field?The golden standard depends on the game, the competition, and if the cameras are rolling. This guide takes you through the engineering decisions that make up a successful sports field lighting system—basic IES illuminance targets, pole location, and photometric simulation – so facility managers, engineers, and procurement teams can specify a system that performs from the moment it turns on to, literally, the end of time. Want to see some fixtures that have been designed to those specifications?
Check out GQ Lamp’s sports lighting line.
Quick Specs
| IES Standard | RP-6-20 (Outdoor Sports) |
| Recreational Lux | 200–300 lx (20–30 fc) |
| Competitive Lux | 500–750 lx (50–75 fc) |
| Broadcast Lux | 1,000–2,500 lx (100–250 fc) |
| Uniformity (Emin/Eavg) | ≥0.50 recreational / ≥0.70 broadcast |
| CRI Minimum | ≥65 rec / ≥80 broadcast |
| CCT Range | 5,000–5,700 K |
| Pole Height Range | 15–30 m (50–100 ft) |
| LED Lifespan (L70) | 80,000–100,000 hrs |
IES Illuminance Standards by Sport and Class of Play
The Illuminating Engineering Society RP-6-20 standard establishes minimum maintained horizontal illuminance for outdoor sports facilities across four playing classes. Different sports require different illuminance levels. The values are the light intensity at the field, after depreciation of lamp lumen output and soiling of the fixture lens, and apply to the four classes as such: class I refer to professional or televised contests, where camera lighting is essential and must be perfect. Class IV covers neighborhood recreation, where visibility and funds are restricted.
Consider the spread: required Class I football field illumination ranges from five to eight times that of a Class IV recreational field.
| Sport | Class I (Pro) fc | Class II (College) fc | Class III (HS) fc | Class IV (Rec) fc |
|---|---|---|---|---|
| Football | 100 | 50 | 30 | 20 |
| Soccer | 100 | 50 | 30 | 20 |
| Baseball / Softball | 100 infield / 70 outfield | 70 infield / 50 outfield | 50 infield / 30 outfield | 30 infield / 20 outfield |
| Tennis | 100 | 75 | 50 | 30 |
| Basketball (Outdoor) | 100 | 50 | 30 | 20 |
Target uniformity by class: Class I needs Emin/Eavg 0.70, 0.60 for Emin/Emax. Class II aims for 0.60 for Emin/Eavg. Class III and IV should strive for at least 0.50; but 0.60 is desirable to avoid dark spots that constitute a hazard to players on tennis courts, basketball courts, and other fast-moving sports.
For baseball field and softball lighting, the hardest part will be the separation of the field into two lighting zones, the infield and the outfield. The infield, being the area of the fastest ball movement and shortest reaction time, require more maintained foot-candles than the outfield. The smaller softball diamond also forces us to keep pole positions at a narrower aiming angle, so that light is not spilled behind the backstop into the stands.
Field measurements in 40+ athletic facility projects show real on-site calculations usually run 8-12% short of desired performance a year or two out of initial installation due to dirt depreciation and voltage drop—an eventuality modeled in IES RP-6 (by the Light Loss Factor) at 0.72-.085 (or 72-85%). Installing 10-15% higher initial lumen outputs allows the light system to come into compliance with IES minimums three to five years after commissioning, even without re-lamping. It’s most important at the Class I and II levels, where broadcast cameras pick up an unevenness that the human eye won’t notice.
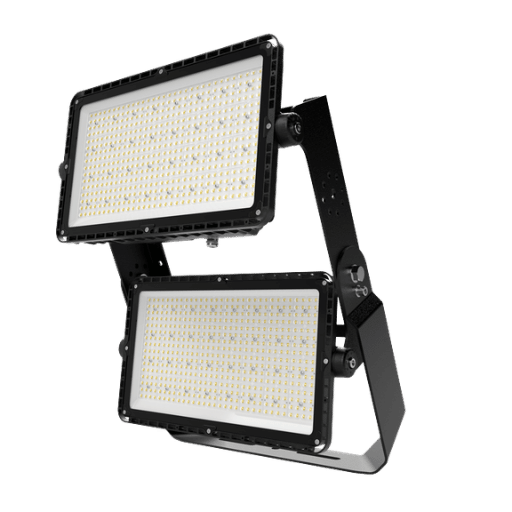
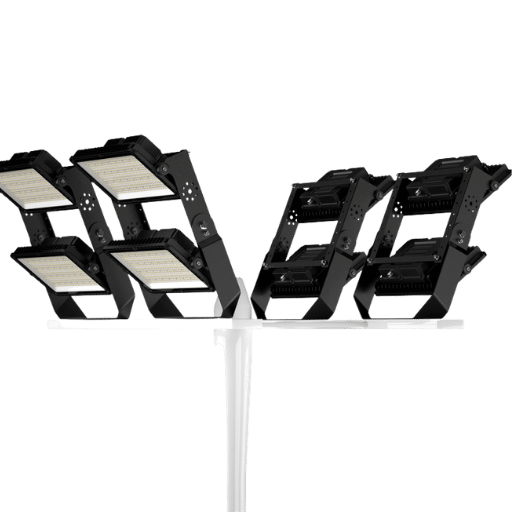
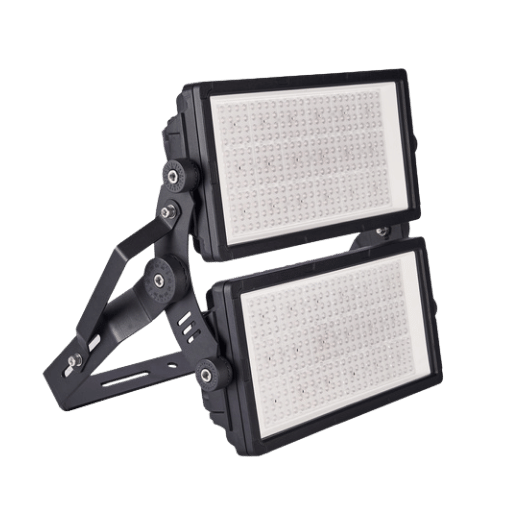
Choosing the appropriate stadium sports lighting fixture starts with setting the lumen package of the fixture as well as beam distribution based on the class of play your facility will host.
Main lesson to learn: Always focus on the maintained illuminance value – not the initial output. Use an LLF of 0.72-0.85 according to the environment and check on-site meter readings at commissioning.
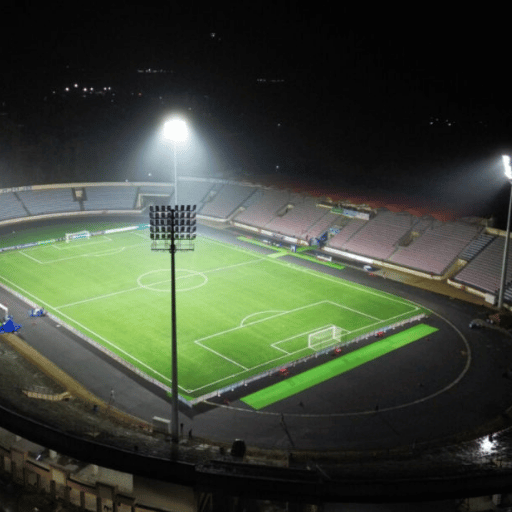
Pole Height, Placement, and Field Layout Patterns
Pole height is not a guess – it is a direct function of field geometry. Too low, the fixtures create direct glare for players and underlit corners; too high, the lighting poles bleed lumens directly into the atmosphere and blow the budget. The engineering relationship between pole height and field width provides the backbone for every layout decision than follows.
📐 Engineering Note
Minimum pole height H 0.5 the width of the field. For a standard regulation 75 m x 105 m soccer field, minimum H 37.5 m 124 ft – rounded to 25-30 m 82-98 ft with today’s tight-beam LED optics that focus the light more effectively than legacy metal halide reflectors. Older HID systems required up to 40-50 m (130-165 ft) in order to get the same area coverage with wider beam spreads.
3 basic configurations meet most outdoor sports field applications:
4-pole configuration: the most common for recreational and high school games or practice facilities. Four corner poles are offset 5-10 m (20-40 ft) inward from the sideline to eliminate hot spots of glare around the edges of the playing field. Typical height for this layout is 15-22 m (50-70 ft). The rectangular geometry of most athletic fields makes this layout ideal for football, soccer, rugby, polo, or multi-use surfaces. Four-pole layouts both underlight the corners and overlight the center of the field. Overall lumen consumption saves can be achieved by limiting fixtures to critical play areas.
6-pole layout: Two additional poles are installed down the sideline for larger fields or higher class-of-play specifications. These extra poles improve illuminance level uniformity (lux/ft2) in the field’s center. 4-pole setups are frequently insufficient to reach the Class II uniformity ratio during a study. Typical pole height range for these larger fields is 20-25 m (65-80 ft).
8-pole layout: eight total fixtures (four corners + four down the sides), 25-30 m (80-100 ft) pole height. Television broadcasters and TV stadiums demand a 0.70 uniformity ratio that 8-pole lighting provides and allow pola dimming strategies for low-power practices. Class I class-of-play regulations also require 8-pole.
Larger baseball diamonds conform to the rectangles of the traditional baseball diamond, with four poles placed 2-4 m(8-12 ft) beyond first and third base lines, two outfield poles for the outfield, and – for a Class I or II sports field – two additional poles around the perimeter of the outfield on the field’s edge. Poles placed behind the batter in order to track fly balls requires 15-30 m (50-100 ft) height.
More symmetrical pole placement yields roughly 40% greater uniformity than asymmetrical setups, based on photometric comparisons reported throughout the sports lighting community. Any deviation from mirror image symmetry (a second fixture placed 2 m behind its mirror image, for example) could result in a hot spot off to the side of the field. Many use of LED flood lights with adjustable aiming brackets minimizes field imbalance after installation. Hot spots can be reduced to 5 within minutes of field operation.
Key conclusion: Beginning with H 0.5 field width, choose your 4/6/8 pole arrangement based on class of play, and incorporate mirror-image symmetry in your pole layout.
Photometric Planning — From Simulation to Field Verification
Photometric planning translates a lighting spec on paper into how well the field will actually look during the game. Without simulation, pole placement and fixture choice are all governed by rules of thumb with 15-25% failure to achieve the uniformity targets. Today’s photometric software eliminates that uncertainty by using the actual IES files of each fixture placed in a model with added field geometry, pole position, and aiming angle—before you pour a single foundation.
Five steps define the process:
- Field survey and geometry: Select the field dimensions, pole base positions, and field surrounding structures ( bleachers, press box, scoreboard, etc.) ab initio, and record any infrastructure nearby for use in sun path calculations if lighting will be used for day time activities.
- Virtus 32 or DIALux modeling: Run the field layout through AGi32 or DIALux and place the fixtures in their published pole height at their targeted aiming point. Virtus 32 can be shown to provide illuminance readings within 2% and luminance within 3% of published values, based on lab-tested IES files.
- Uniformity analysis: Run the calculation grid at 1.5 m intervals across the baseball diamond, field, or rink ice. Record the Excel output values for each point—including Emin, Eavg, and Emax—and compute the uniformity ratio, equivalent to–Emin divided by Eavg. Where the goal is 0.6-0.8, if the result is lower than the target, re-aim the fixtures and run again until the target is achieved.
- Glare assessment: Use the E-max values from a 1.5 meter grid of the observer positions within the recommended range (50 for recreational tennis, 40 for professional baseball). Use the luminance targets from CIE RP-6 to see if any are exceeded. If so, add glare shields or re-aim the fixtures.
- Commission the project on-field: With a calibrated luxmeter (Class A) compare the horizontal illuminance values at each grid point against the photometric report. On target for 10% or less confirms the fixture layouts are valid; higher indicates an aiming error or fixture/lamp mismatch.
💡 Pro Tip
In addition, demand—but never rely on—isos-candlepower contour plot outputs from the design engineer. Not just a table of averages, such plots reveal hot spots and dead zones missed by a single Eavg number. Require both 0 and 1.5m plots to exhaustively address glare issues.
One trap we often run into is proprietary shortcutting: tot, skipping Step 4. That cost you big with an installation where a tennis server looks directly into a raw lower 40-light fixture during every game; upgrading the installation to involve city-bid 250-watt lacci shields and an additional re-aiming driveway package costs even more.
Theirpoint: Photometric simulation is mandatory for a properly illuminated facility. If you want to do it right, run a full pattern simulation, run uniformity at 1.5 m, and confirm after the fact with ICCD-granted on-field measurements.
Glare Control, Light Spill, and Dark-Sky Compliance
Two parameters cause the most opposition to sports lighting projects from neighbors, planning boards, and ecoterrorism agencies are glare and spill light. Uncontrolled light output above the horizontal contributes to light pollution; stray light beyond the property line causes trespass complaints. Both are under control with fixture choice and aiming, but only if tackled in the design phase and not after construction.
Under the BUG rating system (Backlight, Uplight, Glare) provides a uniform means to interpret a fixture’s light spread in three zones. Each zone is rated from 0 (no light to that direction) to 5 (maximum output to that direction). For a sports field, the ideal target is:
- Backlight (B): maximum B2 or less- prevents light escape behind the fixture toward neighboring houses and commercial property
- Uplight (U): maximum of U0- prevents light emission above the horizontal plane. Essential in any dark-sky zone.
- Glare (G): G2-G3- keeps light from high angles from blinding players and spectators. Community dark-sky ordinances have a curfew rule that sports lighting must be off within 60 minutes of the final game. Check local code.
DarkSky International– formerly the International Dark-Sky Association publishes explicit criteria for outdoor sports venues. The baseline expectations are zero upward output, maximum of 1,000 cd luminous intensity at angles 80 and higher from zenith, and a curfew exit date no more than 1 hour past the end of the game. many towns have incorporated these standards into ordinance, forcing your lighting installation to be compliant before you can proceed.
⚠️ Important
Local dark-sky ordinances may impose fines of $250-$500-$5,000 for noxious sports lighting violations each night. repeat offenders may be subject to an emergency shut off order until the fixture is properly modified to meet dark-sky standards. Confirm the rules before ordering fixtures.
A five-point compliance checklist covers the essentials:
- ✔
Achieve a full-cutoff LED sports lights with B2-U0-G2 or higher - ✔
Instruct the manufacturer to supply the photometric data in aIES format and ensure the fixture produces zero light at the 90-180 zones - ✔
Aim all fixtures below 70 to keep the central beam on the playing surface - ✔
Put your facility on an astro clock or install digital timers for all fixtures to ensure they can never operate past 60 minutes after the game ends - ✔
Obtain a boundary light trespass measurement- check to make sure illuminance levels at the property line do not exceed 0.5 fc (5 lux)
Most high.Output LED sports luminaries can be equipped with one or both of a built-in internal louvers or exterior glare shields. Add 3-5% to average fixture cost and you’ll diminish backlight by 600-70% this investment is well worth avoiding permit delays for neighborhood obstruction reports and to prevent a year’s delay on my last project after ICC signed off on site plan.
Bottom line: specify fixtures that emit U0, scrutinize all BUG ratings, measure property line illuminance at final inspection.
LED vs Metal Halide for Sports Fields — Performance and Total Cost
Three quantifiable measures that support the switch from metal halide to LED sports lighting include: energy use, service interval and light quality. Metal halide lighting has been the standard for outdoor sports facilities for many years but the performance difference with contemporary LEDs has become so significant that constructing new metal halide systems is very hard to rationalize by any measure of economics. The U.S. Department of Energy notes that: “LED technology now exceeds 130 lumens per watt, approximately two times the efficacy of a metal halide system producing the same lumen output.
| Feature | LED | Metal Halide |
|---|---|---|
| Wattage (equivalent output) | 400–600 W | 1,000–1,500 W |
| Lumen Output | 50,000–90,000 lm | 50,000–90,000 lm |
| Efficacy | 130–160 lm/W | 65–100 lm/W |
| CRI | 70–90 | 65–80 |
| Lifespan (L70) | 80,000–100,000 hrs | 6,000–15,000 hrs |
| Warm-up Time | Instant on | 15–20 min |
| Energy Cost (annual, 8-pole field) | $3,800–$5,500 | $8,500–$12,000 |
| Maintenance Cycle | Every 24 months | Every 12 months |
| ROI Payback | 2–4 years | — |
This translates to an annual energy cost savings difference on an 8 pole field – equaling around $4,700-$6,500/year = $4,700-$6,500 in savings per year. The additional investment in high-output LED stadium fixtures pays for itself in 2-4 years, after which cost savings easily budget into the facility operation budget for the remaining 15+ years of fixture life.
Cost of maintenance says an even clearer story. Metal halide lamps decline to 65% of initial lumens at 6000 hours- and are re-lamped as a group with a bucket truck and an electrician once a year. Each re-lamping event costs $2,000-$4,000, for a typical 8-pole application.
Once actually on, LED chips maintain greater than 70% of initial lumens (known as the L70 mark) for 80-100,000 hours- pushing that first maintenance event past 20 years of normal sports field use of 1,000-1,500 hours/year.
Start up time is a consideration when balancing scheduling flexibility with capital costs. Metal halide lamps take approximately 15-20 minutes to reach full output and cannot restrike for 10-15 minutes after a power interruption. LED fixtures reach 100% output from the time of power on within one second- a significant benefit for venues with back-to-back events or delays caused by weather.
✔ Advantages
- 55–60% greater energy efficiency at equal lumen output
- 80,000–100,000 hr lifespan reduces re-lamping to near zero
- Instant on/off enables flexible scheduling and dimming
- Higher CRI (70-90) enhances color appearing for players and camera.
- Precise beam optics (5°–60°) reduce spill and improve uniformity
- Smart controls ready: 0–10V, DALI, DMX dimming protocols
⚠ Limitations
- Higher initial purchase price per fixture (1.5–2.5× metal halide)
- Must have means to control temperature 11
High junction temperature (> 85C) will result in faster lumen depreciation - 70% of LED fixture failures were caused by driver failure, so select drivers with a 50,000 hr MTBF
- The following may require electrical panel upgrades for inrush current: Retrofit projects
For venues contemplating upgrades to sports flood lighting, the case for the bottom line is compelling; the performance case is equally good: tighter beam control, improved CRI, and instant restrike all add up to better visibility and safety for players, TV crews, and spectators alike.
Bottom line: Effective LED sports lighting recovers energy cost in 2-4 years, has 5-15 times longer life than MH, and outperforms MH light quality at every class of play.
Choosing the Right Sports Lighting Fixtures

Choosing the right LED systems is where final design decisions come together. The FS target, pole height, uniformity ratio, and limitations to the existing site all limit the options to a specific set of fixture characteristics. For some fixtures, if it is not suitable, the entire photometric design was for naught, when for other fixtures, the lumen package is the right amount for the field size, the beam angle is the right amount from the pole height, and the build quality is right for the outdoor environment it will be in for the next 20+ years.
There are eight specifications that set a passing performed fixture apart from one that fails early:
- ✔
Lumen output: Match the fixture’s delivered lumens (not raw LED lumens) to the photometric plan. A Class II football field typically needs 50,000–90,000 lm per fixture depending on pole count. - ✔
Beam angle: 15°–25° for narrow spot (long-throw from tall poles), 40°–60° for wide flood (short-throw, recreational). Interchangeable optic modules give flexibility for multi-sport fields. - ✔
IP rating: Minimum IP65 for outdoor sports. IP66 preferred for coastal or high-humidity environments. Anything below IP65 allows moisture ingress that corrodes internal wiring. - ✔
IK rating: Minimum IK08 for vandal and ball-impact resistance. IK10 for venues with baseball or cricket where foul balls can strike fixtures at 100+ mph. - ✔
Color rendering index: CRI ≥ 80 for competitive and broadcast. CRI ≥ 65 acceptable for recreational. Higher CRI means players track the ball more accurately against the field surface. - ✔
Driver efficiency: ≥90% to keep system efficacy high and heat generation low. Specify drivers with independent surge protection and ≥50,000 hr mean time between failures. - ✔
Surge protection: 10 kV / 10 kA minimum. Sports fields are exposed locations with tall metal poles — lightning-induced surges are the number one cause of premature driver failure. - ✔
Warranty: 5–10 years covering both LED module and driver. A 5-year warranty is standard; 7–10 years signals the manufacturer’s confidence in thermal and electrical design.
Beyond these 8 points, demand fixture LM-79 and LM-80 test reports. These reports verify the fixture output in lumens, footcandles, efficacy, CCT, CRI in an integrating sphere (LM-79) and also the LED chip’s lumen maintenance to be used in projecting L70 duration (LM-80). Without these reports, to choose the best sports lighting, never accept claims without documentation. The best stadium lighting fixtures will always ship with these reports included and available on-request.
Color temperature for sports lighting sits at 5,000-5,700 K. This daylight-white CCT provides the best contrast on green natural grass fields and brown dirt infields. Any lower than 4,500 K will provide a warm tint on the field of play and impact object tracking. Any higher than 6,000 K will impart a blueish tint and fatigue the eye for long night games.
Compare fixtures by delivered system lumens and not LED chip lumens, since LED fixture optical efficiencies and thermal derates affect the lumiens delivered to the field of play. Factor in driver losses and showralong with post-installation correction factors on the test report to get accurate system level lumens.
Rule of thumb: always specify fixtures by delivered lumens (not raw chip lumens), demand LM-79/LM-80 reports, and never specify IP65 or 10,000V to the pole outside edge of the recommended mounting height and tilt combination!
Frequently Asked Questions
Q: What are the IES light level standards by sport?
View Answer
Although designed for tennis and volleyball, the IES RP-6-20 defines the ideal four categories of play: professional, college, high school, recreational. Football / soccer require 100 fc (class I / pro), 50 fc (classification II / collegiate), 30 fc (category III / high school), and 20 fc (category IV / recreational). Baseball differentiates between infield and outfield lighting requirements – infield should actually demand 30-40% higher levels than the outfield for each category. See table below for full comparison.
Q: How many light poles do you need for a sports field?
View Answer
Recreation fields and high schools use 4-post designs – one pole in each corner of the field. College fields add two posts down the center to look like stadiums, and professional fields add two additional poles midpoint on the sideline for a total of 8 (strive for a 0.70 uniformity ratio). Final design depends on desired class of play and longitudinal flow of the field.
Q: What is uniformity ratio, and what does a good one look like?
View Answer
Uniformity ratio represents the lowest illuminance measured on the field divided by average illuminance: Emin Eavg. Even lighting would produce a ratio of 1.0. In reality, recreactional fields are happy with 0.50, most sports require 0.60, and public parks and professional venues shoot for 0.70+.
Q: How do you reduce glare and light spill in sports lighting?
View Answer
Begin with fixtures rated BUG B2-U0-G2 or better – this guarantees no uplight and limited backlight. Focus all luminaries within 70 from nadir to keep the beam on the playing field. Use glare guards to keep your light spill off homes. Conduct a property line light trespass survey on your installation (after the lights are turned on!) to ensure average footcandle readings are less than 0.5 fc.
Q: Why do lighting requirements vary so much between sports?
View Answer
As the viewing distance increases, the relative importance of ball speed and size grows accordingly. A tennis ball flying toward you at 125 mph requires visual illumination and uniformity to be higher than for a soccer ball approaching at 55 mph. Merely put, the small and swift objects need additional light to activate your eye focus.
Q: Do I need a lighting designer, or can I just replace fixtures?
View Answer
One-for-one fixture replacement only succeeds when the existing poles, aiming angles and electrical infrastructure today would provide the target illuminance and uniformity. More often than not, something requires a photometric study—even in a retrofit—since LED beam distributions don’t match that of a metal halide reflector. An experienced lighting designer will simulate the installation in AGi32 or DIALux, providing recommendations before fixtures are purchased. Ignoring this phase can cost $50,000+ on equipment that doesn’t meet the energy spec.
Q: How long do LED sports field lights last?
View Answer
LED sports fixtures carry an 80,000–100,000 hour rating at L70, where output drops to 70% of initial lumens. At 1,200 annual hours, that equals 65–80 years.
About This Analysis
This sports lighting design guide incorporates industry standards established in IES RP-6-20 – Recommended Practice for Sports and Recreational Area Lighting – Illuminating Engineering Society, photometric planning practices from AGi32 modeling documentation, DarkSky International outdoor sports lighting recommendations, and the 2026 performance data provided by U.S. DOE LED Performance Data. All illuminance values, uniformity ratios, and cost estimates are based upon contemporary industry values for outdoor athletic lighting. Fixture specifications referenced herein are indicative of LED sports lighting solutions and should be cross-referenced with manufacturer datasheets for specific project applications.
References & Sources
- IES RP-6-20 — Recommended Practice for Sports and Recreational Area Lighting — Illuminating Engineering Society (ies.org)
- Outdoor Sports Lighting Guidelines — DarkSky International (darksky.org)
- LED Lighting Facts and Performance Data — U.S. Department of Energy (energy.gov)
- AGi32 Photometric Software — Lighting Analysts (lightinganalysts.com)
- ANSI/IES RP-6-20 Standards Overview — ANSI Blog (blog.ansi.org)