Get in Touch with GUANGQI


![The Complete Guide to Solar Street Lights: Selection, Sizing & Installation [2026]](https://gqlamp.com/wp-content/uploads/2026/04/1-25.png)
Solar street lights are now no longer an off-grid anomaly, but a mainstream lighting category in a global industry worth $13.99bn and growing at 16.2 per cent p.a. (The Business Research Company 2026). No one however seems to fully high light the selection criteria that are most critical to the investment story – the sizing calculation, the climate correction to batteries, the standards adherence demanded by municipality tenders. This guide discusses the factors involved in the selection, size calculation and installation of a solar street light project to last 10 years or collapse in 2.
Quick Specs: Commercial-Grade Solar Street Lights
| Global Market (2026) | US$13.99B → US$25.51B by 2030 (16.2% CAGR) |
| LED Efficacy | 130–170 lm/W (commercial grade, per IEC 62722-2-1) |
| Battery Standard | LiFePO4, 2,000+ cycles / 5–7 year outdoor lifespan |
| IP Rating | IP65 (secondary roads) / IP66 (highways, coastal) |
| Autonomy | 3–5 consecutive rainy days (PVsyst default: 4 days) |
| Key Standards | CIE 115:2010 (road illuminance), IEC 62722-2-1:2023 (LED performance) |
How Solar Street Lights Work: The Four-Component Energy Loop
A solar street light is a simple closed-loop energy system: a solar panel gathers sunlight, a charge controller channels the energy into a battery, and after sunset a photocell or motion sensor turns an LED lamp head until the energy is used up. Four things make this loop shine or flunk.
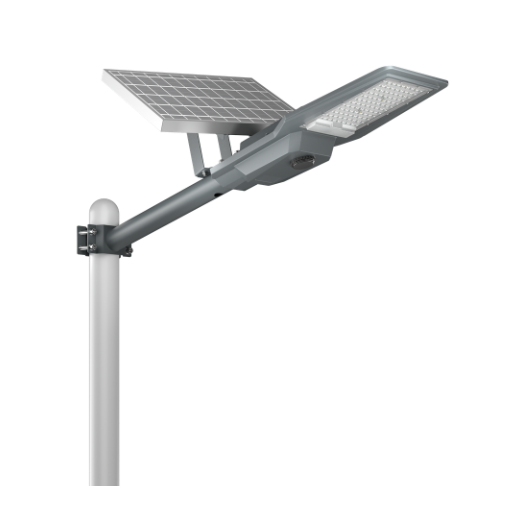
1. Solar Panel – Almost all commercial solar street lights use monocrystalline photovoltaic cells. These are panels that have efficiency of approximately 19-22% at converting sunlight into DC electricity. Monocrystalline panels degrade at a rate of roughly 0.4-0.5% p/a, about 4 times slower than polycrystalline panels, which is the reason manufacturers authorize 25-year output warranties.
2. Charge Controller – The controller determines how much of the panel’s energy is stored in the battery. An MPPT (Maximum Power Point Tracking) controller retrieves 25-30% more useful energy than a PWM (Pulse Width Modulation) controller, particularly at lower sun angles at the beginning and end of the day. For systems above 40W, the additional cost of an MPPT controller is balanced during the first year of operation.
3. Battery Pack – LiFePO4 (lithium iron phosphate) has alchemically converted the lead-acid and (more recently) generic lithium-ion cells for the entire commercial sector on the three specifications: 2000+ cycle life at 80% depth of discharge, safe discharge range of -20°C to 60°C and inherent thermal stability that prevents runaway. One snag the marketing hype often neglects: LiFePO4 only charges between 0°C and 45°C – below freezing the lamp still turns on but the cell cannot take in solar energy, hence the need for big batteries (see sizing discussion below).
4. LED Lamp Head—The efficacy of commercial-scale LED light sources is between 130-170 lumens/W—tested in accordance with IEC 62722-2-1: 2023. Lifetime of an LED module rated L70—defined in IEC 62722—is such that it maintains a lumen output greater than or equal to 70% of its initial brightness across 50,000 hours of use (roughly 13 years of dusk-to-dawn operation).
📐 Engineering Note
MPPT efficiency is more important for less sunny climates than for sunnier. A 200W panel with PWM will produce about 120 kWh/year in Seattle, whereas the same panel with MPPT will produce about 156 kWh/year, which is roughly a 30% improvement and can often be the difference between 3 and 5 days of autonomy without upscaling the panel.
How Does a Solar Street Light Charge on a Cloudy Day?
Monocrystalline panels do not need direct sunlight to charge — even on overcast days they generate electricity from diffuse light (at about 10–25% of rated output under heavy cloud). Charge controllers route that partial current into the battery just as they would under direct sunlight. When correctly calculated for an appropriately sized system, “worst-case” insolation data sets for the installation region have the battery discharging on several cloudy days, not during the night as planned (that is to say, if the autonomy rating is adapted to the climatology).
Solar Street Lights vs. Grid-Powered Street Lighting: A 10-Year TCO Framework
The grid-vs.-solar call often does not focus on the price of fixtures; instead, the lagging cost of the cable trench, the long-haul electrical tariff over ten years, and the maintenance requirements after Year 5 determine the choice. This is the language municipal tender teams speak when simultaneously weighing grid and solar:
✔ Solar Wins When
- Grid connection cost exceeds US$500/unit (typical for rural roads)
- Project site is off-grid or grid is unreliable
- Local electricity rate is above US$0.12/kWh
- Installation speed has great impact – you’re live the same day
- The site is vulnerable to copper theft or vandalism
⚠ Grid Still Wins When
- Existing trenched infrastructure is available and functional
- Annual peak sun hours is under 2.5 (averted from above the Nordic circle or frequently foggy regions)
- Dense urban canyons with permanent shade on panel crown
- Budget cannot absorb higher upfront unit cost
- Load exceeds 400W per fixture with 14+ hour runtime
This is an approximate comparison of 10-year total ownership costs based off US$0.15/kWh commercial electricity rates and 30 meters of cable run:
| Cost Category | 100W Solar (USD) | 100W Grid (USD) |
|---|---|---|
| Fixture cost | 550 | 180 |
| Pole & foundation | 200 | 200 |
| Cabling & trenching (30m) | 0 | 1,200 |
| Electricity (10 yr) | 0 | 1,800 |
| Battery replacement (year 6) | 120 | 0 |
| 10-year total | 870 | 3,380 |
The discrepancy shrinks considerably when cable distance is less than 15m or the electricity is subsidized. Municipal tender teams routinely compare the solar-to-grid TCO but will be surprised how far each varies by region.
How to Size a Solar Street Light: Wattage, Lumens, and Battery Autonomy
Sizing is an area where most specs are silent and that most failures begin. Design of a properly sized solar street light hinges on three sequential choices — lumen output, panel wattage, and battery capacity — each supported by a calculation that takes seconds when inputs are correct:
Step 1: Determine Required Lumen Output by Road Class
The equivalent standard is CIE Publication 115:2010 which tackles roadways separated into three families: M-class (motorized traffic), C-class (conflict points such as intersections), and P-class (walkways). Municipal tenders usually cite the M-class subclasses (M1 through M6) to state minimum luminance and illuminance values, which are then converted to lumens of required output for each LED fixture.
| Application | CIE 115 Class | Pole Height | Required Lumens | Solar LED Wattage |
|---|---|---|---|---|
| Residential pathway | P3–P4 | 4–6 m | 3,000–6,000 | 20–40W |
| Community street | M5–M6 | 6–8 m | 6,000–10,000 | 40–80W |
| Secondary urban road | M3–M4 | 8–10 m | 10,000–15,000 | 80–120W |
| Main arterial | M2–M3 | 10–12 m | 15,000–25,000 | 120–200W |
| Highway / interchange | M1–M2 | 10–14 m | 25,000–50,000 | 200–400W |
Step 2: Calculate Panel Wattage
A panel must capture no less then the energy required (modulated for MPPT efficiency and hours of ideal sunlight):
📐 Panel Wattage Formula
Panel Wattage ≥ (LED Wattage × Operating Hours) ÷ (Peak Sun Hours × MPPT Efficiency Factor)
Example (100W LED, 10 hr operation, 4 peak sun hrs, 0.85 MPPT factor): 100 × 10 ÷ (4 × 0.85) = 294W panel minimum
Step 3: Size Battery Capacity — The 3-Day Autonomy Rule
Battery capacity controls how many cloudy days can pass before the system needs to recharge itself. Here is the core formula:
📐 The 3-Day Autonomy Rule
Battery Capacity (Ah) = (LED Wattage × Nightly Hours × Autonomy Days) ÷ (System Voltage × DoD)
Example (100W LED, 10 hr/night, 3-day autonomy, 24V system, 0.8 DoD for LiFePO4):
(100 × 10 × 3) ÷ (24 × 0.8) = 3,000 ÷ 19.2 = 156.25 Ah → round up to 160 Ah for extra margin
According to PVsyst, the industry rule-of-thumb, default autonomy should be 4 days in virtually any climate and never less than 3 days, even in the most southern latitudes. Climate-zone adjustments look like this:
| Climate Zone | Peak Sun Hrs/day | Autonomy Days | Panel Oversizing |
|---|---|---|---|
| Desert / Tropical | 5–7 | 3 days | 1.0× baseline |
| Mediterranean | 4–5 | 3–4 days | 1.15× |
| Temperate (US Midwest, Central EU) | 3–4 | 4 days | 1.33× |
| Nordic / Monsoon | 2–3 | 5+ days | 1.67× |
Any site-specific calculation that inputs local solar irradiance data is either done by a lumen sizing calculator, which does the sum elimination, or checked by a climate autonomy calculator, which look for a suggestion to check historical cloud-cover data.
💡 Pro Tip
Sizing errors are additive. A 10% undersized paneer coupled with a 10% undersized battery does not equal a 10% shortfall – it results in fixtures that continuously run out of charge on the fourth cloudy consecutive night, then never make it all the way back up through the following week. When running blind, indoors, two or three times the commercial step-up in both panel wattage and battery Ah is a safe bet.
Solar Street Light Installation: From Site Assessment to First Light

The long tail up search phrase “solar street light installation” points to a deeper issue: installation is not just the action of screwing the fixture to the pole. Installation is a 5-phase process that begins prior to pouring any foundation and serves as the tail end of the life of the asset, determining whether the fixture holds up through after its first rainstorm and first winter.
The 5-Phase Installation Checklist
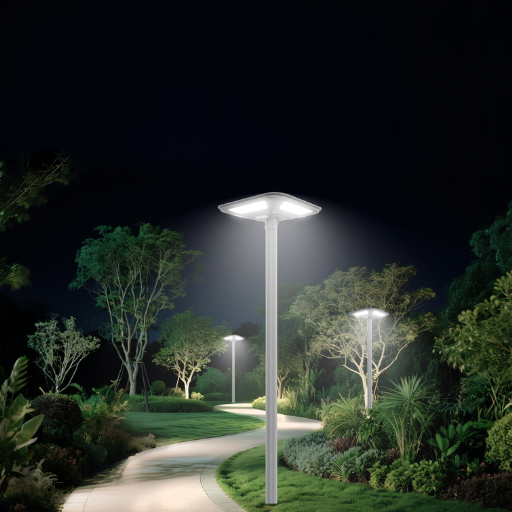
- 1) – Site Survey – taking a road measurement, verifying pole spacing (25-40 m typical for secondary streets), identifying any shade sources nearer than 10 m from the prospective pole crown, and noting local wind zone to guide foundation dimensioning.
- 2) – Foundation – developing a concrete footing with depth proportional to pole height (around 1.2 m for a 6 m pole, 2.0 m for a 10 m pole). In cyclone or coastal zones that same footing should be IEC 60598 rated to a 150 km/hr sustained wind load.
- 3) – Pole & Bracket Mounting – confirming the pole diameter matches the fixture adaptor (60-76 mm ISOM), torqueing the bracket bolts per manufacturer specification, and confirming the panels electrical orientation – within 15 of true south for the northern hemisphere, true north for the southern.
- 4) – System Commissioning – running the controller through a full charge and discharge cycle, calibrating the photocell setting, establishing the PIR range (8-12 m typical), and testing the dusk to dawn switch over.
- 5) – Handover Record – recording the as-installed pole GPS coordinates, state-of-charge of the batteries at handover, and utilising serial numbers to register warranty. Without documentation a bank of failed cells is all but irretrievable.
How Long Does It Take to Install a Solar Street Light?
Installation speed is constrained by system configuration. All-in-one modules, wherein panel, batteries, and LED form a unified housing, virtually always deploy in under 1/2 hour per fixture with a two person team following a tree. Split units, with a panel mounted separately from the lamp, take 1–2 hours per fixture, mostly because of the tilt adjustment for seasonal power maximizing. Foundation work is the pace-setter; a concrete footing takes over 2 days to reach design strength, which is why construction crews work in batches.
The Seven Installation Mistakes That Kill Projects
Seven failure modes are cited repeatedly by project remediators who work exclusively in the field. A synthesis of three teams specialized in storm roofing installs emerges with this top seven:
- Raised panel where morning or afternoon shade hits the crown more than 2 hours per day – incorrect location accounts for a significant share of failures.
- Untilted, stock-from-factory orientation (typically 15) that has not been re-oriented for the installation site’s latitude; 30-45 is needed in most locations in the far north or south.
- Pole or mount not rated against local wind load, resulting in damage to the first heavy gust – in fact, structurally-unsafe mounting is far more frequent than the manufactures claim.
- Nearby artificial lighting causes the fixture’s photocell to stay shut down at dusk to dawn, slowly depleting the battery during working hours.
- 8-Photometric design analysis skipped- resulting in black holes in between the poles (or dazzling glare in between the luminaires- revealing idiots at the design helm).
- Unsealed cable connectors which corrode during the first Monsoon season, leading to intermittent charging faults during the worst possible circumstances.
- Foundation excavation was blindly copied from a catalog product without regard for local soil conditions or wind zone- accounting for the largest single cause of structural failure.
For buyers conducting their initial outdoor lighting project, an amortization calculator that expense-calculates installation cost items alongside equipment costs often catches budget issues before tender.
Solar Street Lights in Cold & Cloudy Climates: Sizing for Autonomy
Do Solar Street Lights Work in Winter and on Cloudy Days?
When properly defined by design, yes, it does work. A belief that solar street lights fail in cold and cloudy regions persists because the first generation of consumer-grade fixtures was heavily undersized for anything beyond tropical sun. Commercial LiFePO4-based systems function reliably at -20°C, and monocrystalline panels generate a diminished yet meaningful amount of power under overcast sky. Real design challenges center not on whether winter solar is feasible but on how many consecutive overcast days the battery can sustain.
The Cold-Weather Caveat: LiFePO4’s Asymmetric Temperature Range
LiFePO4 batteries have a well-established BD (cold discharge, warm charge) split. Warm discharge (for powering the LED at night) is feasible from -20 C to 60 C. Recharging, on the other hand, is only reliable from 0 C to 45 C. Below freezing temperature, the battery discharges normally but cannot absorb solar power- so a luminaire above 50th latitude may go many midwinter days where the battery is still drawn down without recharging. Storage capacity can be increased (see the 1.33 to 1.67 panel multipliers above) or, for extreme locations, a thermal storage wrapper placed outside the enclosure.
How Many Consecutive Rainy Days Can a Properly Sized System Handle?
A 3-day battery backup system includes three fully clouded days in a row without dimming (50 %nominal power). A 5-day battery backup system- common in the tropics and mid/high latitudes- proves even more resilient. What destroys the calculation is 3 straight days where the panel remains below 30 %nominal insolation when the battery was already partly drained by an earlier cloudy week. Properly designed-to-weather-site builds in safety margin for exactly this situation; this is why the PVsyst 4 day maximum autonomy figure is treated as an average.
💡 Pro Tip
In high (northern) latitudes (>45 th), require a photometric study supporting the December 21 ‘worst case’ design date. Any luminaire that meets illuminance standards on that day will do so for the rest of the year.
Solar Street Light Lifespan and Maintenance: What Most Buyers Overlook

Solar street light marketing cannot and should not be comparing headline Lifespans – 50,000 hour LEDs, 25-year panels – while unceremoniously sliding past the battery, the component most likely to fail. Valid lifespan planning considers each subsystems’ failure mode and deploys scheduled preventative maintenance accordingly.
| Component | Rated Life | Most Common Failure |
|---|---|---|
| LED module | 50,000–80,000 hrs (L70) | Driver IC, not LED chip |
| LiFePO4 battery | 2,000 cycles / 5–7 yrs | Capacity fade in hot climates >40°C |
| Solar panel | 25-year rated output | Dust accumulation (15–25% output loss in arid zones) |
| MPPT controller | 10–15 yrs | Capacitor aging, water ingress |
The disheartening counterweight to the marketing figures is drawn from the industry installer bases who are tasked with post-deployment failure tracking: U.S. industry anecdotal reporting indicates an inordinate majority of solar street light projects underperform inside 2 years of commissioning, and the common denominators are conformance to low-quality or recycled battery pack cells, usage shortcut resulting in fixture shading or dust accumulation, and lack of thermal management in a tropical weather setting. These issues are not sin qua non components of the solar street light idea, all three can be procurement specification boxes for the buyer to check.
“A thorough commissioning report is the single most neglected step – without a recorded implementation baseline battery state-of-charge reading on day one, there is no credible way to distinguish between a year-five capacity fade, and a year-two manufacturing error.”
A Maintenance Schedule That Actually Works
- Monthly (site crew): Observation of LED lumen output, clean panel surface of debris or bird droppings, confirm fixture is powering up at night time.
- Quarterly (site crew): Surface clean panel glass with smooth cloth and cleanser water- avoid abrasive cloths; verify PIR sensor distance still accurate.
- Annually (technician): Record battery state-of-charge at dawn, check cable connections for corrosion, read controller fault codes, tighten pole guy wires.
- Year 5-7 (certified technician): Battery capacity check – if capacity below 80% of rated Ah, replace system; compare panel output to original commissioning baseline data.
Procurement Checklist: 8 Specifications to Verify Before Ordering Solar Street Lights
Design specifications sheets are intended to sell, designed to win a tender. Eight inflexible specifications below are the verifications that designate a durable, well functioning commercial solar lighting system – and they comprise the essential questions procurement teams pose to manufacturers’ sales teams.
The 8 Non-Negotiables
- Batttery chemistry to be LiFePO4 (no generic lithium-ion, reject lead-acid as it does not suit open air use)
- Charge controller to be MPPT for > 40W systems (PWM permitted for pathway fixtures 40W and under)
- IP65 minimum for secondary roads, IP66 for highways and coastal installations.
- Efficacy of LEDs 130 lm/W proven with an LM-79 or IEC 62722-2-1 photometric test – not a marketing data sheet.
- Necessary approvals: CE (EU), RoHS, IEC 62722-2-1 for LED, add UL 8750 or ETL for US installations.
- Warranty: LEDs for 3 years, Battery for 2 years, Panel for 5 years, Controller for 3 years – each as separate lines in the quotation, not a lumped together number.
- Autonomy of 3 days at minimum required system location, default 4 days for generally temperate/variable weather locations, 5 days for equatorial monsoon locations or Nordic scree, simulation data used not an unsubstantiated claim.
- Pole kit: Adapter diameter 60-76 mm standard, wind load water rating IEC 60598 150 km/h constant wind.
Scenario-to-Specification Matrix
| Project Type | Wattage | Battery | IP / Certifications |
|---|---|---|---|
| Residential pathway | 20–60W | LiFePO4 20–60 Ah | IP65 + CE + RoHS |
| Municipal secondary road | 80–150W | LiFePO4 80–120 Ah | IP65 + CE + IEC 62722-2-1 |
| Highway / industrial | 200–400W | LiFePO4 150–300 Ah | IP66 + CE + IEC 60598 wind |
When referencing the specification sheet, and identifying the best value solar street light, a project buyer should be able to cross-reference the above list of verification questions against their comparative model selection exercise against three or four shortlisted vendors, within a single work session.
Frequently Asked Questions About Solar Street Lights
Q: Are solar-powered street lights any good?
View Answer
Commercial quality solar street lights designed (or at least correctly specified) with LiFePO4 batteries, MPPT controllers, and adequate monocrystalline panels run for 10 years or more in nearly any climate. the difference between a “good” solar street light and a retail disaster is three bits of procurement choice: battery chemistry, charge controller, and autonomy days appropriate to local solar insolation. consumer grade fixtures under US$100 do not deliver the endurance required for municipally or commercially targeted lighting applications.
Q: How long does a solar street light last?
View Answer
LED modules are rated 50,000-80,000 hours (about 12-18 years at 10 hr/ night), panel output is conservatively rated 25 years with a 0.4-0.5% annual degradation rate, and LiFePO4 li-ion batteries should hold 80% of initial capacity after 2,000 cycles (roughly 5-7 years, 365 cycles/year). By process of elimination, the batteries are the component most likely to need replacing first, with LED modules and the panels outliving the first battery swap by a decade.
Q: What are the disadvantages of solar street lights?
View Answer
Increased capital cost (+ 2-3 a grid powered fixture for like wattage), performance variation related to shadow cast by anything on the panel arc, and the necessary second battery replacement cycle in 5-7 years. Deep winter seasonal regions and locations with persistent fog require conservative planning, increasing panel and battery expense. These are not rating criteria that should be decided on by the purchaser for fear of surprise failures.
Q: Do solar street lights work at night without sunshine?
View Answer
Yes. Energy that the system consumes at night is stored in the battery during the day, regardless of whether the sun is shining at that moment or not. Properly sized systems incorporate an auto- nomy cushion of three to five days, covering for several consecutive cloudy days.
Q: Why are my solar street lights not working?
View Answer
Most issues with field failures can be attributed to five things. First, tree grow-in or spreading from a building that developed after the fixture was installed – a quick check of the site from the top of the pole crown will usually indicate it. Second, battery capacity decline after 5-7 years, can be tested with a simple dawn state-of-charge measurement. Third, MPPT controller fault code, often caused by water invading aged cable entry points. Fourth, PIR motion sensor drift, which causes it to become overly active and dimming the fixture whenever the wind blows. Fifth, a newly installed interior light source cast photocell alarm. This troubleshooting sequence will usually solve 90% of the problem without having a technician visit site.
Q: Are solar street lights worth the investment for commercial projects?
View Answer
Yes—when calculating the payback period for most municipal and commercial applications, real-world figures are that a properly specified system will require 3-4 years to amortize by cabling and electric savings, and will then have 6-10 years of effectively zero operating cost remaining. the economics are most favorable when trenching for the grid extension would require something over 30 meters of cable per pole, or when per kilowatt hour electricity tariffs are above US$0.12. sites with power rates like these may choose to simply continue with grid-linked street lighting.
Design Your Next Solar Street Lighting Project
If this pricing and sizing formula and optimization advice has generated more questions about an actual project than it answered, Guangqi Lighting engineers will provide a free photometric layout plan for any confirmed project site. Send pole-to-pole road width, pole height, and wattage target to the engineering department – they will return an ideal fixture number, wattage, and pole spacing within 48 hours.
Request a Commercial Solar Street Light Quote
About This Analysis
This solar street light guide is based on Guangqi Lighting’s engineering experience of over a decade in manufacturing commercial outdoor luminaires, and the design data compiled over 9 solar street light families operating in Southeast Asia, Middle East and East Africa. KWh per year sizing formulas and battery autonomy figures are derived from learned performance of field deployments in our own Photovoltaic system sizing calculation, checked against CIE 115:2010 and IEC 62722-2-1:2023 standards.
References & Sources
- Solar Street Lighting Global Market Report 2026 – The Business Research Company
- CIE Publication 115:2010 – Lighting of Roads for Motor and Pedestrian Traffic – International Commission on Illumination
- IEC 62722-2-1:2023 – Luminaire Performance: LED Luminaires – International Electrotechnical Commission
- Solar Street Lighting: Highland Park Pathways to Power (Feb 2024) – NREL / U.S. Department of Energy
- PVsyst Autonomy Days and PV Capacity Guidance – PVsyst Community Documentation
- Autonomy and Battery Sizing (Stand-Alone) – PVsyst Official Documentation
Related Articles
- Commercial Solar Street Lights – 9-series from 20W to 400W
- Solar Street Lights with Pole – Complete systems for turnkey projects
- Solar Flood Lights: Specs, Types, and Installation Explained
- Solar Flood Lights vs LED Flood Lights – When each wins
- Solar Street Light Model Comparison Tool

![IP Rating Guide: IP65 to IP69K Decoder + Chart [2026]](https://gqlamp.com/wp-content/uploads/2026/05/0-1-150x150.png)