Get in Touch with GUANGQI


Retail Lighting: Ambient, Accent and Task Lighting

A clothing aisle may appear bright, while jackets on a wall rack may remain in the shadows. A shelf above them may block the light. A meter on the floor will miss that problem. For a retailer deciding on the right lighting fixtures, the first step may be deciding where the light should be positioned. Build the lighting strategy around the surfaces shoppers and staff need to see, then count ceiling positions.
Retail lighting uses ambient light for circulation, accent lighting for merchandise, and task lighting for work such as scanning labels at checkout. Check light at the aisle, shelf face and worktop separately, then approve a sample bay with the actual products, finishes and controls.
What are the four types of lighting?
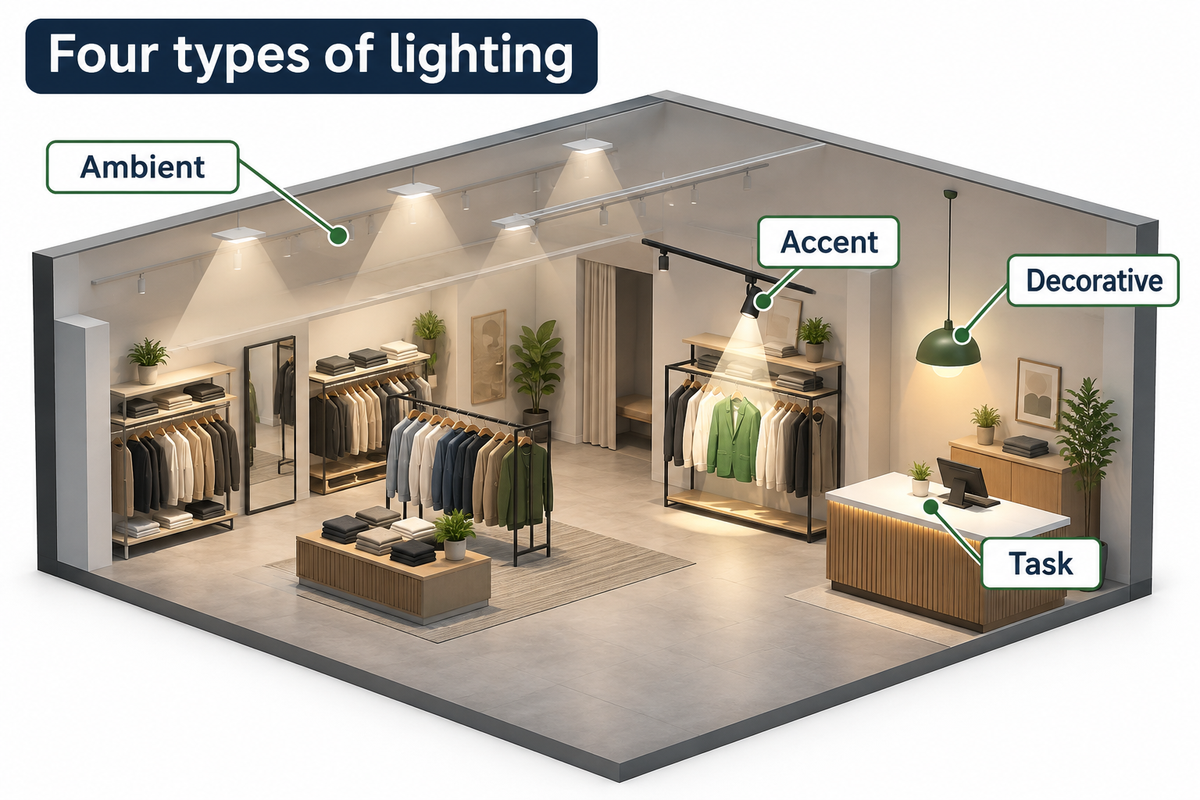
The four types of indoor lighting discussed here are ambient, accent, task and decorative lighting. For an indoor LED layout, the first three do the work of lighting the route, merchandise and counter. Decorative lighting gives the space its visual character. These apply to types of retail with various emphases for a grocery aisle, a boutique and a showroom. A pendant can do two jobs when it also lights the counter. The ANSI overview of retail lighting practice describes using ambient and accent light together for visual interest in department stores.
- Ambient lighting gives the sales floor and circulation paths a consistent base. Diffuse linear fittings or broad-beam downlights can suit a regular grid.
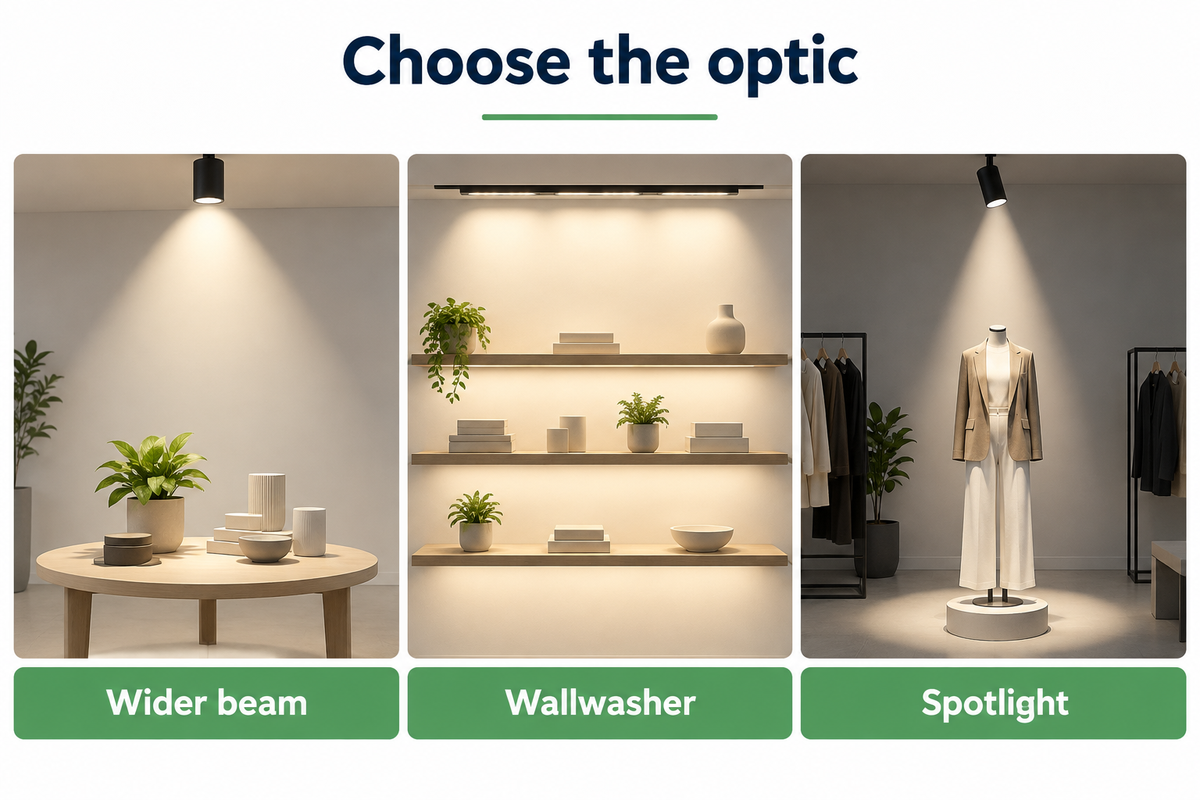
- Accent lighting pulls focus to a window display, feature wall, or product grouping. A narrow beam can isolate a mannequin, while a wallwasher disperses light along a wider display.
- Task lighting illuminates surfaces where shoppers and staff do close work. Check the till, returns desk, fitting-room mirror and stockroom packing bench during the job each is meant to support.
- Decorative lighting adds a visible element, such as a pendant or wall sconce. The fixture can have a second job if it doesn’t adversely affect the surface in question.
Walk from the entrance to the checkout with the accent circuit dimmed. Check visibility at aisle turns and work surfaces in the intended scene. Restore the accent layer to see where your eye lands. Make the store layout readable by prioritizing the main feature over adjacent displays. If a highlight disappears against the brightness of the whole room, dim the competing layer before ordering brighter LEDs. Adjust the relative emphasis of competing displays before adding more light.
How do you light each zone of a retail store?
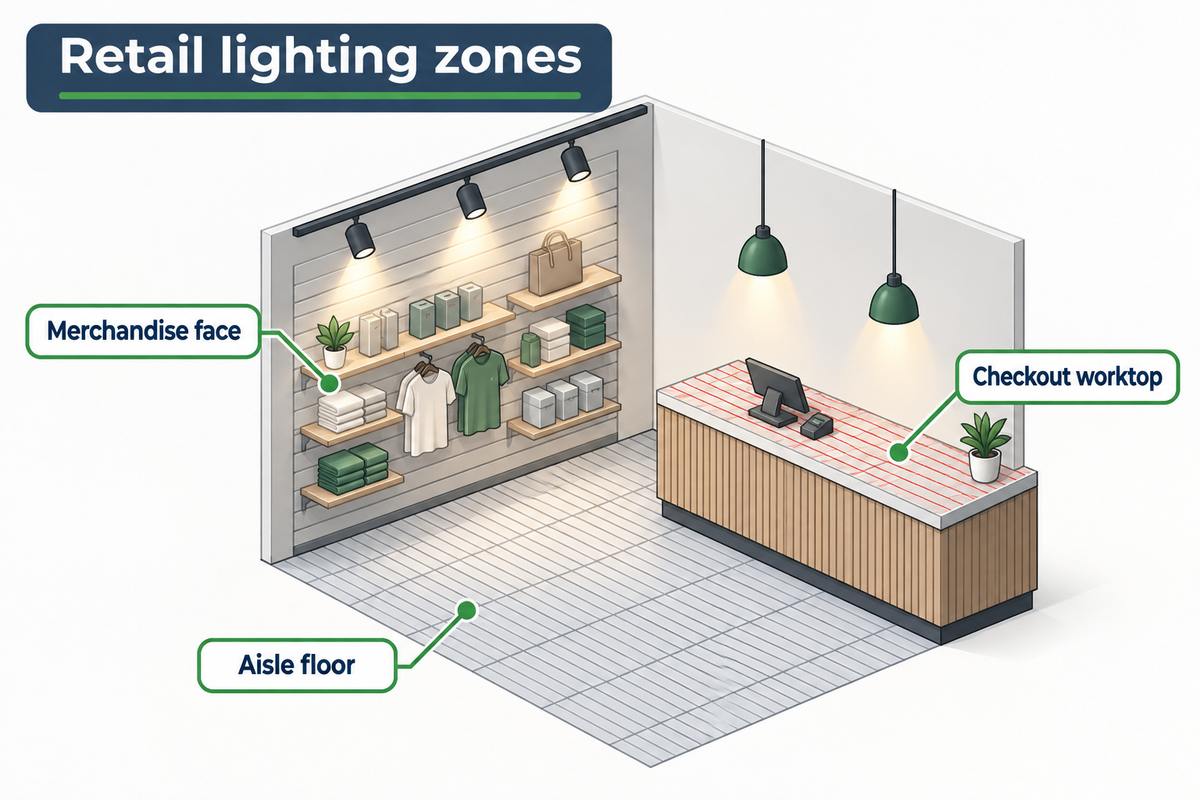
Start the retail lighting design by identifying the surface to light in each zone and the position from which to inspect it. For a wall of product, shoppers have to look at hanging stock and face-level shelf displays. In an aisle, the edge of fixtures and the floor guide customer movement. The same ceiling layout can light those surfaces quite differently.
ERCO’s guide to shop lighting highlights the difference between vertical and horizontal surfaces and mentions wallwashing to even out displays. Use the worksheet to apply that idea to your own floor plan. Lighting in retail stores serves different jobs along the same route. At the perimeter, shoppers judge the detail of a garment on a vertical surface. Near checkout, the operator needs enough illumination on a label that sits flat.
| Zone type | Layer and target | Where to check | What to adjust first |
|---|---|---|---|
| Window and entrance | Accent on the featured products, ambient light along the approach | From the pavement by day and after dark | Change the aim or scene when a reflected light source hides the display. |
| Sales aisle | Ambient light along the path and through turns | Along the route at both ends and around tall fixtures | Check the spacing and distribution before increasing the whole floor’s output. |
| Shelf and wall display | Accent or wallwash on the vertical merchandise face | Across the display at its top, middle and bottom | Test a broader distribution or a shelf-level fitting when the upper shelf shades lower products. |
| Fitting room | Task light on the face and clothing, plus ambient fill | In front of the mirror at likely standing positions | Move or shield the source if its reflection competes with the face. |
| Checkout | Task lighting on labels, receipts and counter surfaces | From the operator’s side with the scanner and screen installed | Adjust the light or screen angle if reflections obscure labels or the display. |
| Feature table | Accent lighting on the center and edges of a product group | At the front of the table and from the main aisle | Use a broader distribution if the beam leaves the edge products in shadow. |
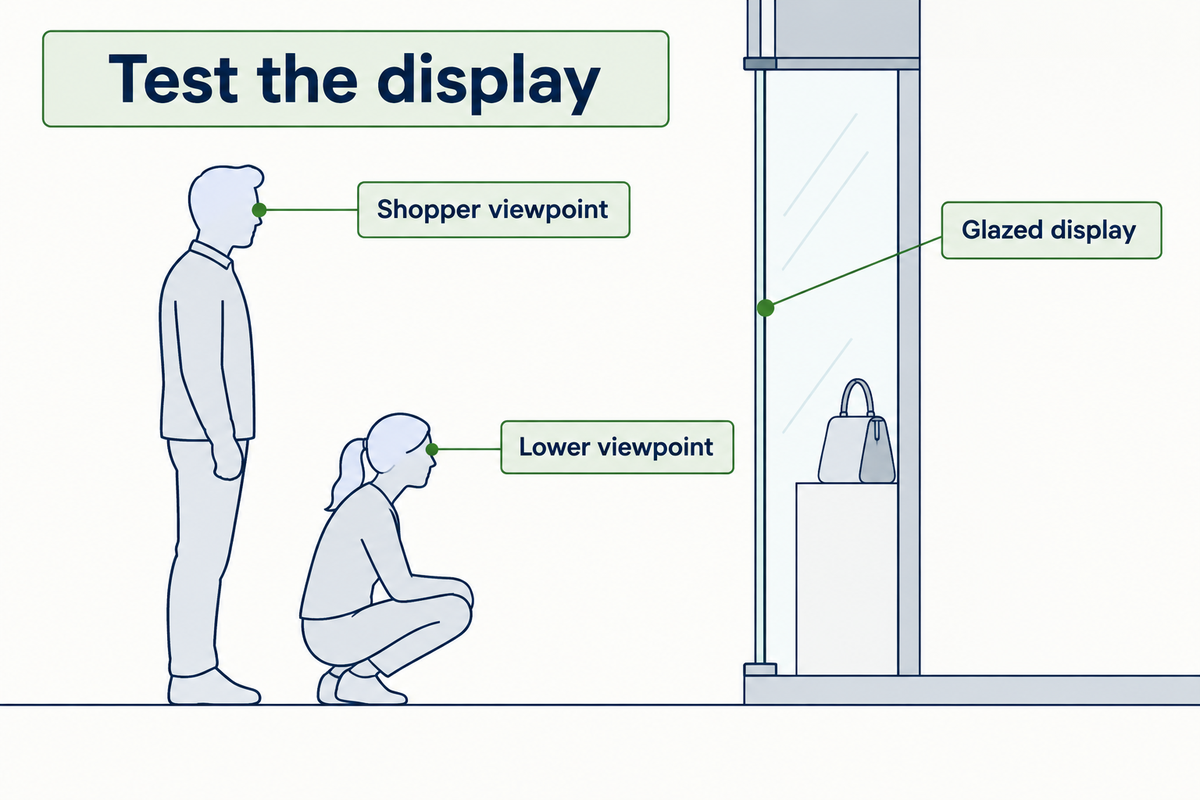
| Glazed case | Accent light on objects and small price labels | From the typical approach and from a lower viewing position | Move the bright reflection away from the labels and display objects. |
| Returns desk | Task lighting on inspection and paperwork | From the staff side with merchandise placed on the desk | Change the fixture position if hands or shelving shade the inspection area. |
| Stockroom | Ambient light between racks and task light at the packing bench | In the rack aisle and at the bench in the restock scene | Check sensor timing where staff stay still to read or pack labels. |
Use the Reflected Ceiling Plan as well as the Furniture Plan. Tall shelving and dark finishes change what the shopper sees. A sample on an empty floor can look balanced until a rack blocks the beam. Assign the lighting circuit on the same plan so that teams can adjust the window or feature wall independently of the aisle. For store owners comparing two lighting solutions, that drawing also reveals which specific areas each quote covers.
When should you choose track lighting over recessed lighting?
When choosing the right optic for displays that move with the merchandise plan, start with an adjustable track head and verify its range at the actual mounting height. Recessed or suspended linear fixtures can give a fixed route more consistent general lighting. Many stores use a regular ambient layout and run track along walls or above the display tables that change most often. A high bay stockroom and a low sales ceiling are two different lighting applications. Keep their layouts separate when comparing the fixture schedule, especially where mounting heights and rack positions differ.
Which optic suits a shelf or display table?
Choose a wider beam for a display table with grouped products, a wallwasher for continuous vertical shelving, or a spot for a small target. Coverage is judged at the actual distance from the light source to the display, using the photometric file for the fixture and optic in question, and checked in the first site test.
Select fixtures in ERCO’s published track spotlight range illustrate how using a compatible optic can change a distribution from accent lighting to wallwashing. If the project reuses a rail, identify the manufacturer, system, voltage, and adapter. Provide the driver and dimming method in the review. A similar-looking head can belong to a different family. In an older fluorescent installation, inventory the original fittings before assuming a replacement LED bulb will work. Some proposals retain the housing. Others price a complete fixture change and separate control system.
Recessed lighting can suit a tidy ceiling in a shop with a stable floor plan. In retail settings where fixtures must be less visible, check a recessed adjustable fitting from the shop entrance as well as under the display. For a shop that changes its window display each month, find out who can re-aim the heads and how the approved positions will be recorded. That decision affects the maintenance handoff as much as the fixture order.
How much light should reach the merchandise?
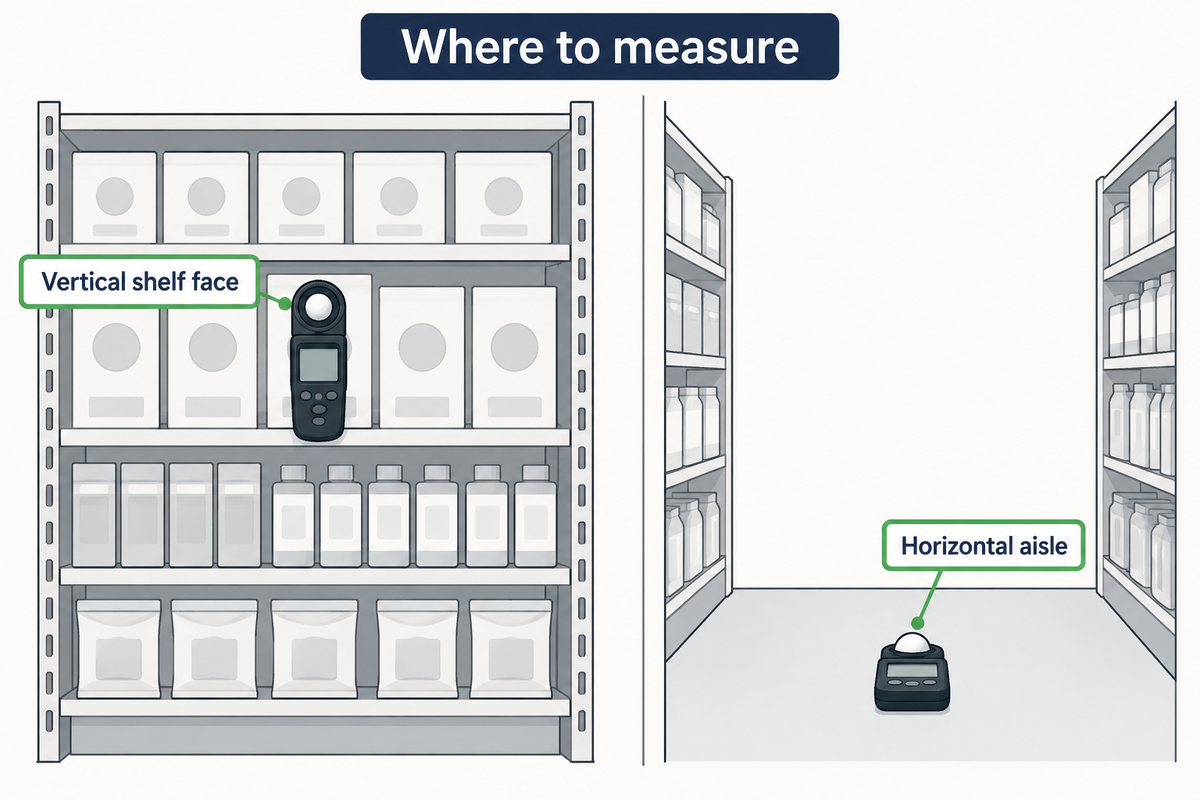
Use a separate illuminance target for a shelf face, aisle and checkout counter work surface. Measure illuminance on each surface with the sensor oriented to that surface. Lumens describe the output of the luminaire. Lux describes illuminance on the surface. A bright light source can put plenty of light on a nearby floor while a shelf face off the beam stays dark. Measure the surface in question.
How do you measure a shelf face?
Hold the meter sensor in the plane of the product face and keep your body clear of the beam. Mark the shelf location and the meter location on the drawing. Hold the sensor horizontal and measure the aisle. Then measure the worktop in its own plane. Compare repeat readings at the same points and with the same control scene.
Readings in a worked example. Suppose the aisle measures 300 lx and a jacket display measures 120 lx on the vertical plane. After the track head is re-aimed, the jacket face measures 210 lx and the aisle still measures 300 lx. The change shows what reached that display. The owner still needs an agreed target and a visual check of the fabric and glare before approving it. In this example, brighten the jacket face by changing where the light lands. Raising the aisle circuit would use more power while leaving the original aiming problem in place.
ANSI/IES RP-2-20 is a recommended practice for retail spaces. Confirm appropriate task, target and maintenance assumptions with the project designer. Keep the initial sample readings for comparison after cleaning, refocusing or remerchandising.
How do color temperature and color rendering affect products?
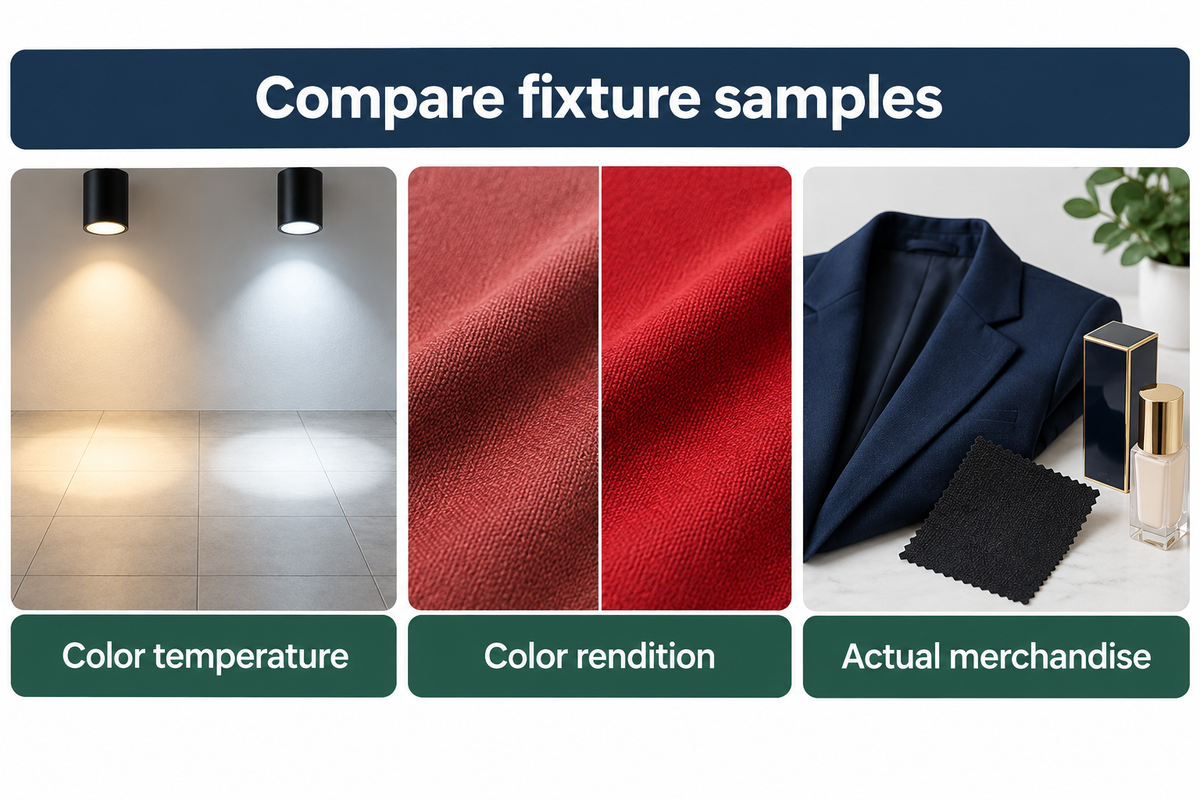
Correlated color temperature describes the warm or cool look of white light. Color rendition determines how things look under the light. Two different fixtures, with the same color temperature, can make a red fabric or a skin tone look different.
Department of Energy’s TM-30 tutorial explains that color fidelity describes similarity to a reference, while gamut information helps explain saturation changes.
The color rendering index and R9 guide includes what to ask for when a catalog only provides CRI.
Compare samples at the same level of illumination, under lighting conditions similar to those planned for the store. Use merchandise that is difficult to judge, such as navy and black textiles, natural skin tones or glossy cosmetic packaging. Move from the sales floor to the fitting room and see if the colors still appear the same. When the look changes at the transition, check the sample and fixture specification before approving a bulk order.
How should you zone controls and compare retrofit costs?
Group lighting systems by how each part of the shop operates. A shop window may run after the sales floor closes. A fitting room may need an occupied scene, while checkout still needs task light during closing. Identify the zones on the lighting plan and note which switches, schedules or sensors control the zones. Motion sensors can suit a stockroom where visits are short. A street front window may require a separate schedule to remain lit after the sales floor dims. Smart lighting is useful when staff can identify the scene in use and return it to the approved setting after an override.
Set opening, trading, restocking, and closing scenes. Using the actual LED light fixtures, drivers and controllers, test each scene and the lowest setting the store plans to use. Check for visible flicker or uneven dimming between fixtures. The Department of Energy’s research on flicker outlines how LEDs and drivers can produce variations in light output. If a visual check concerns you, request the test data for that combination. Review the DALI controls guide for info on the project using that system.
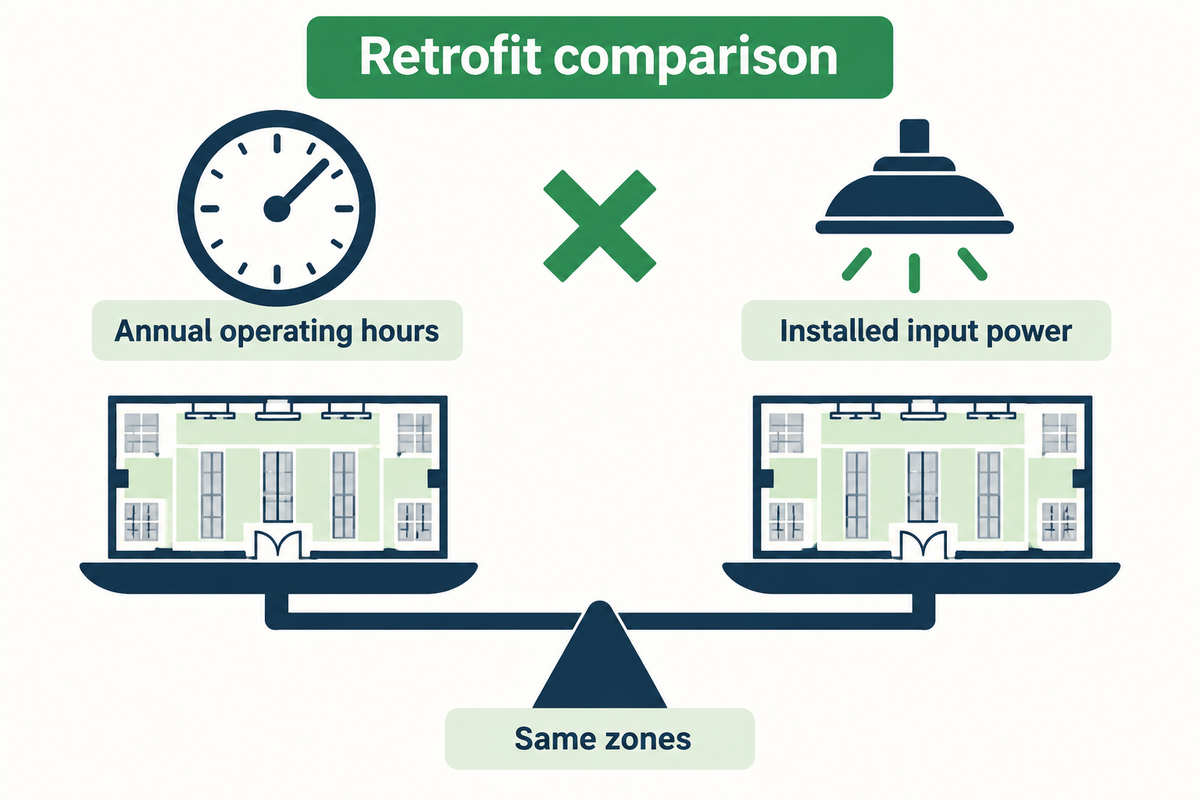
Same-scope retrofit comparison. Ask for fixtures and optics costs, track or adapter changes, driver and control compatibility, installation access, disruption and commissioning. When suppliers quote LED lights for retail stores, a proposal for new heads on reusable track may be a lot cheaper to install than one that includes circuits, after-hours access and daylight harvesting. Ask for installed input power and forecast annual operating hours per zone. Use measured input or a documented wattage assumption for each scene. When an LED retrofit quote includes energy savings, confirm that the baseline covers the same zones and trading hours.
| Zone | Annual hours | Existing load and use | Proposed load and use |
|---|---|---|---|
| Ambient | 3,200 | 1.2 kW × 3,200 = 3,840 kWh | 0.9 kW × 3,200 = 2,880 kWh |
| Display | 1,800 | 0.8 kW × 1,800 = 1,440 kWh | 0.5 kW × 1,800 = 900 kWh |
| Total | 5,280 kWh | 3,780 kWh |
In this example the difference is 1,500 kWh per year. Multiply this by the relevant energy rate to estimate the annual impact on electricity costs. For an investment comparison, include the installed price, tariff, maintenance and expected replacement costs. A control upgrade can also impact when lighting is used. Record the hours behind each scene, so bids can be compared on an even basis.
How do you test a retail lighting mock-up?
Build one representative bay with the proposed fixtures, shelf height, finishes and products. Run the normal sales and closing scenes. The merchandiser can judge which products stand out, store operations can test checkout and restock tasks, and the buyer can record the model and optic that passed. Walk the sample in the sequence a customer would use it. Assess the shopping experience at the actual displays as well as from the main aisle. The in-store experience includes the move from a window display to an aisle display and from the display wall to the fitting room. In order to evaluate this part of the customer experience, have someone walk the route with the displays that are being tested, while another person switches through the shop’s scenes.
Walk toward a glazed display and stop where a customer would read the label. Repeat from a lower viewing position and check the window after dark. The Canadian Conservation Institute’s museum display guidance describes a mock-up method for finding reflections before fabrication. Apply the view-angle check to the shop and judge it with the actual glass and merchandise.
| Sample check | Observed condition | Adjustment and acceptance |
|---|---|---|
| Shelf face in trading scene | Lower garment sits in shadow while top shelf is clear. | Compare a wider optic and remeasure both marked shelf points. Merchandiser confirms detail is visible at the agreed points. |
| Window glass from the pavement | A reflected spotlight sits over a price card at night. | Re-aim or shield the light. Repeat the approach and verify the card can be read at the marked stop. |
| Checkout during closing scene | Display accents are dimmed and a fixture pulses at the lowest setting. | Confirm the approved driver and controller combination, test the full intended range and keep the counter readable in the closeout scene. |
| Aisle turn by a tall rack | The aisle center is clear; a rack hides the turn from the entrance. | Inspect both approaches with the rack in place. Adjust the beam where the turn falls into shadow. |
| Feature table after a reset | A wider merchandise group extends outside the approved beam. | Re-aim or change the optic. Confirm that products at the edges remain visible and save the new aiming position. |
| Fitting-room mirror | Light from above leaves deep shadows on the face. | Test a second source position. Judge the face from typical standing positions with the fixture reflected in the mirror. |
| Dark fabric under two samples | Navy and black are difficult to distinguish under one fixture. | Compare the same fabric at similar measured illuminance. Save the selected color specification with the fixture code. |
| Stockroom with the sensor active | Staff stop moving while reading and labeling packages. | Test the real work interval and any manual override. Agree on a scene that supports the task. |
| Daylight at the entrance | The front display and aisle use the same scene despite changing daylight. | Test the front zone in bright and overcast conditions. Record which circuit changes and check that aisle visibility is maintained. |
Record the luminaire model, optic, track or mounting point, aim, finish, scene and actual measured values. Take a picture from each agreed position. Add the agreed upon time for recheck and cleaning to the hand-off. If the store alters the shelf position or substitutes a driver after approval, perform the same check.
Frequently Asked Questions
What is the best lighting for a retail store?
Use ambient lighting for aisles, accent lighting for merchandise and task lighting for close work. Start planning lighting for retail with the shelves, circulation and counters on the floor plan. Check the conditions after racks and products are in place. A boutique and a grocery aisle can use the same layers, with different optics, priorities and controls for their products and tasks.
What lumens for shop lights?
Select luminaire output and optics together to deliver the target illuminance on the intended surface at the specified height. A broad optic, a narrow spotlight and an under-shelf light can distribute the same output very differently. For a retail space, check the floor, merchandise face and worktop separately. Use the exact fixture’s photometric data and compare results in a sample bay.
How do you light a shop window at night?
Aim the accent beam at the product and check the result from the pavement after dark. Glass reflections can hide product details or pricing at a specific approach angle. Test the planned night scene with the display in place and adjust the aim, shielding or output until the item and its label are easy to see.
Can existing track be reused for an LED retrofit?
Yes, reuse it when the installed rail and proposed head, adapter and controls are compatible. Photograph or identify the rail and existing head, get the matching documentation and test a sample on the actual system before ordering the full quantity.
How much does it cost to upgrade a clothing store to LED lighting?
The installed price combines equipment, access and labor. A fixture swap that reuses existing track and circuits usually has fewer items to price than a fit-out with new rails and controls. Ask for an itemized quote for the retail LED lighting upgrade. Compare fixtures, adapters, electrical work, lifts, off-hours installation and commissioning against the same scope. Then compare maintenance assumptions and operating hours by zone.
Is decorative lighting a separate layer?
Yes. It gives the store a visible design element, such as a statement pendant or wall sconce. The same fitting can also provide ambient or task light when its distribution supports that job. Check the surface it serves before counting it twice.
Which brands make adjustable track lights for retail displays?
ERCO is one example of a brand that publishes adjustable track spotlights with a range of optical distributions. Super Bright LEDs publishes guidance on identifying track families for retrofit. Before choosing a supplier, compare the specific head, rail, adapter, optic and driver and confirm who provides replacement components. Ask for a sample of the proposed combination so the store team can evaluate the display under its actual dimming scenes.
What should you put in the lighting brief?
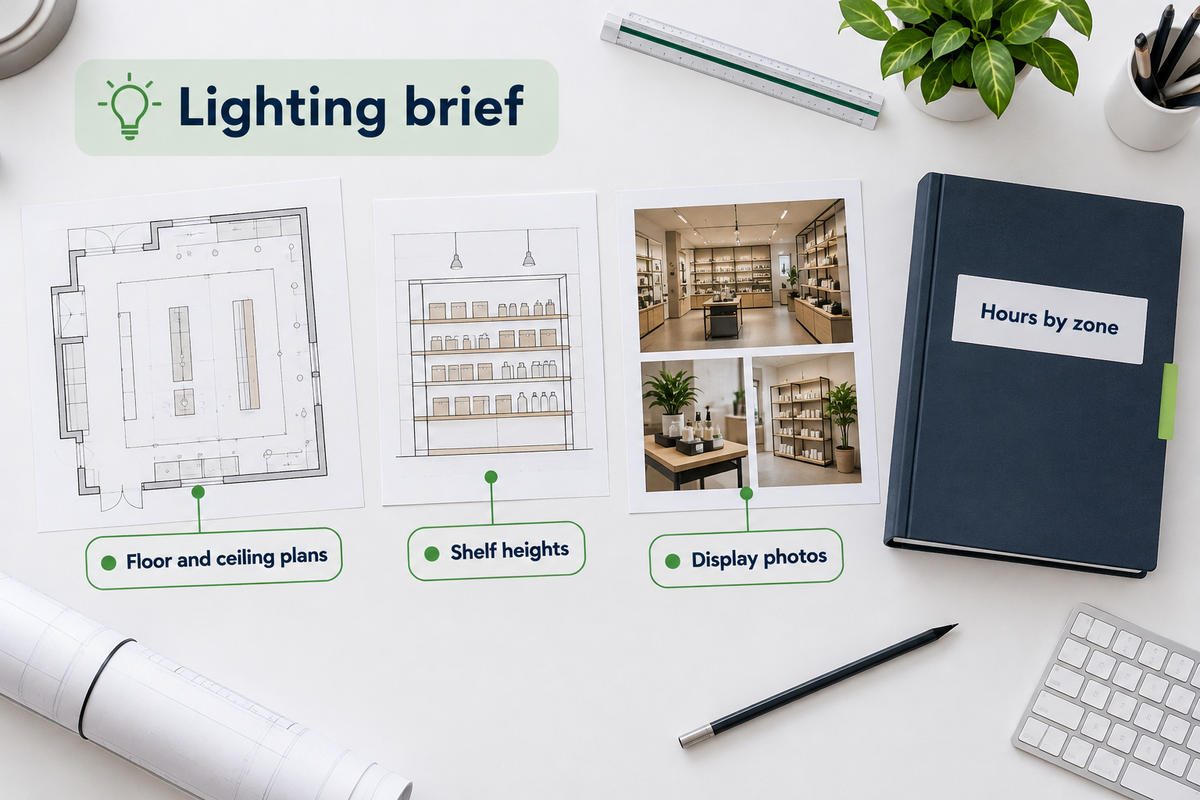
For a retail store lighting brief, send floor and ceiling plans, shelf heights, display photos, hours by zone and the surfaces to be checked. Include details of the existing rail or driver (if reused in the new store). The lighting design deliverables guide explains documentation of handoff. Add quotes against that brief to compare retail lighting solutions for the same zones and tasks. The Guangqi Lighting about page describes the company’s in-house optics design and engineering and smart driver and project customization capabilities.
If the fit-out also changes the exterior approach, include the facade and pedestrian paths in the commercial landscape lighting design brief. Send the indoor and outdoor plans with the areas marked separately.
References & Sources
- Illuminating Engineering Society. Recommended Practice: Lighting Retail Spaces. Public scope.
- U.S. Department of Energy. TM-30 Basics and Flicker Research.
- U.S. Department of Energy, Federal Energy Management Program. Purchasing Energy-Efficient Commercial and Industrial LED Luminaires.
- Canadian Conservation Institute. Agent of Deterioration: Light, Ultraviolet and Infrared. Glazed display reflection discussion.