Get in Touch with GUANGQI


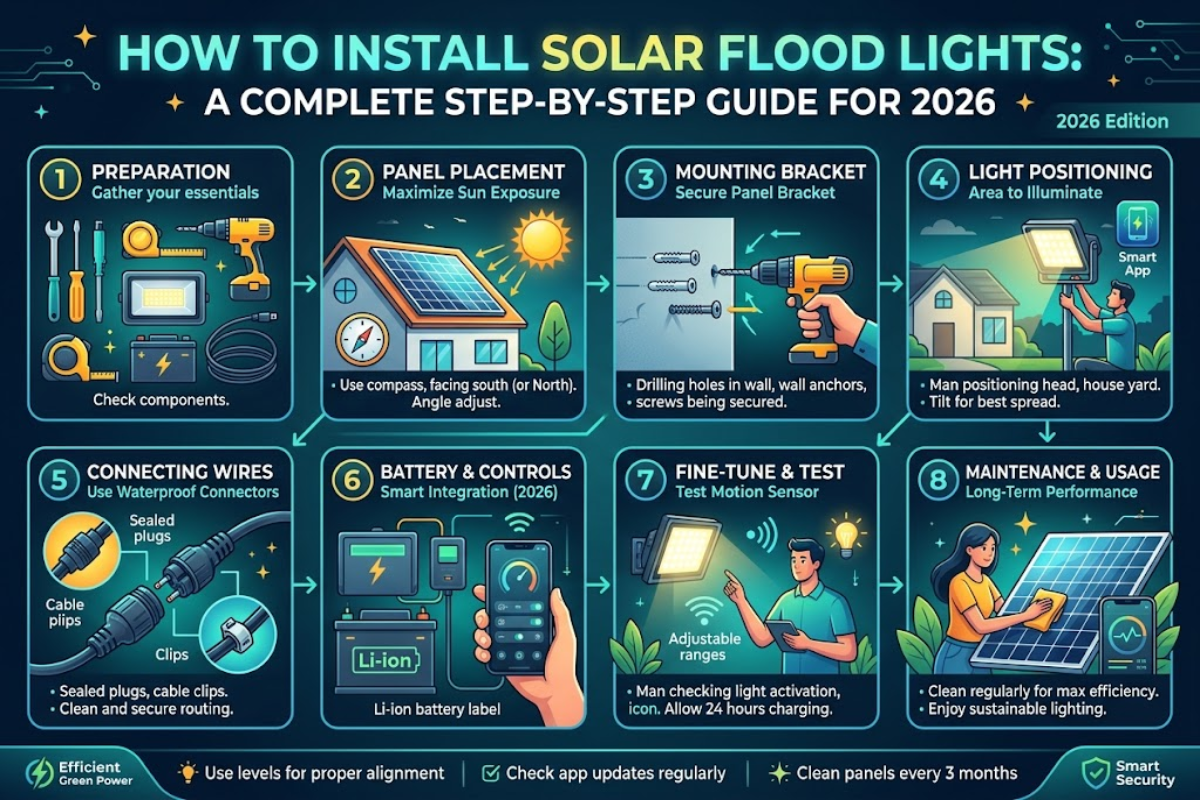
How to Install Solar Flood Lights: A Complete Step-by-Step Guide for 2026
Knowing how to install solar flood light systems correctly is the difference between a fixture that lights up your driveway for five years and one that flickers out after three months. Most failures come from three install-time choices: the wrong mounting height for the use case, a solar panel angled like an afterthought, and a motion sensor left at factory defaults. This guide walks through every step — anatomy, tools, location decisions, mounting hardware, panel orientation, sensor tuning, charging, and troubleshooting — with real specs from NREL, the U.S. Department of Energy, and IES recommended lighting practice. Most installations need no electrician.
Quick Specs
| Typical install time | 25–45 minutes per fixture (all-in-one) |
| Tools needed | Cordless drill, 3/16″ masonry bit, M6 anchors, level, ladder |
| Mounting height (residential) | 8–10 ft for security; 6–8 ft for pathways |
| Solar panel tilt | ≈ Your local latitude (NREL PVWatts standard) |
| First charge before use | 24–72 hours direct sunlight |
| Permit / electrician | Not required for low-voltage solar (per NEC Art. 411) |
1. How Solar Flood Lights Work — Anatomy Before You Install
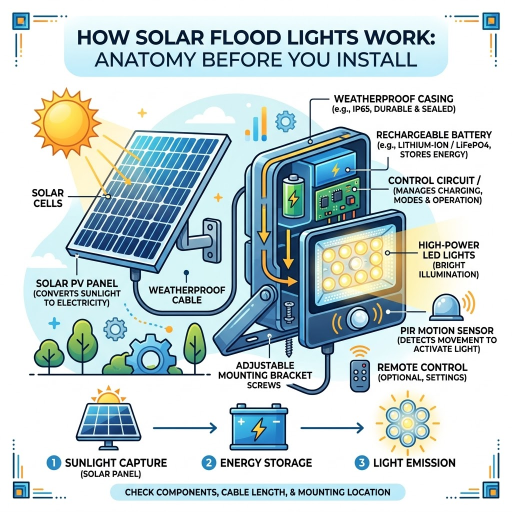
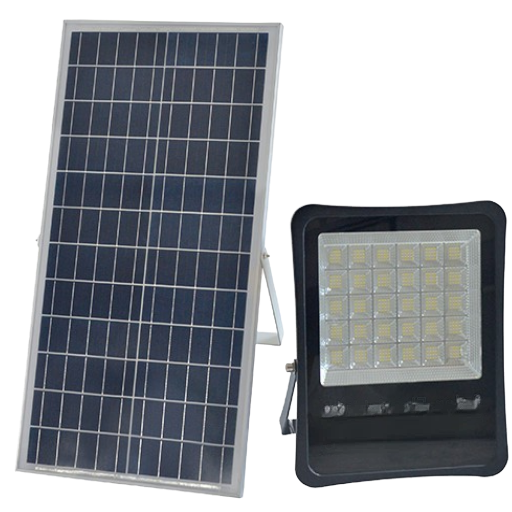
A solar flood light is four components working together as one outdoor lighting system: a photovoltaic solar panel, a rechargeable battery, an LED driver, and (usually) a PIR motion sensor. Compared with grid-tied solar lights, the entire energy chain runs off-grid through that on-board battery. Power flows from the panel into the battery during the day; at night, the driver pulls from the battery to power the floodlight. Knowing which part lives where decides how you mount.
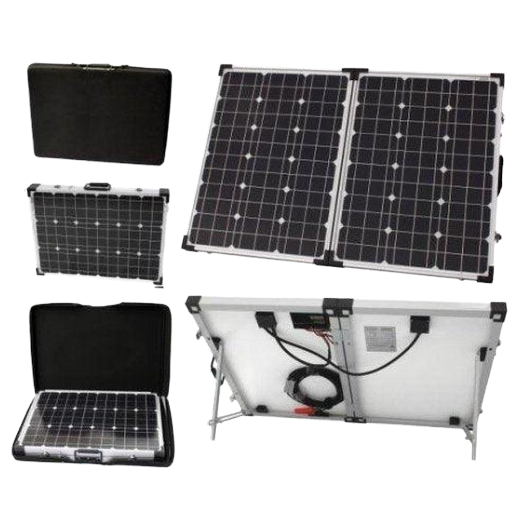
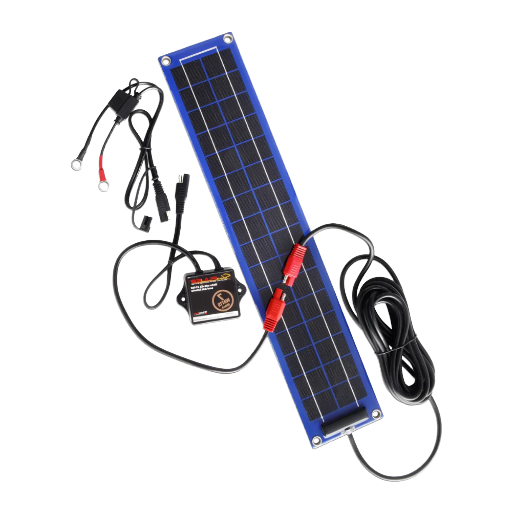
Two physical formats exist. All-in-one models integrate the panel, battery, and floodlight into a single housing — the easiest install because nothing runs between separate pieces. Split-panel models place the solar panel on a separate mount with a 10–20 ft cable to the light fixture, which lets you put the panel in full sun while aiming the light wherever coverage is needed. When eaves are shaded, garages have overhanging trees, or rooflines face the wrong way, split-panel is the only practical choice. Our all-weather solar flood light models ship in both configurations to fit either situation.
Battery chemistry matters more than competitors mention. Cheaper units use Ni-MH cells rated for 500–800 charge cycles, which works out to about two years of daily use before noticeable capacity loss. LiFePO4 batteries deliver 2,000–5,000 cycles — a five-to-seven-year service life from the same cell pack. The PIR sensor draws a few milliwatts standby and the driver itself another few milliwatts, but it is the battery that ages out first. For an in-depth comparison of solar flood light specifications, see Solar Flood Lights: Specs, Types, and Installation Explained.
The housing has an IP degree of protection given by IEC 60529: IP65 provides dust-tight protection from jets of water at a low pressure from any angle, IP66 provides jets at a high pressure from any angle, and IP67 provides the same for a temporary submersion. In most residential outdoor lighting, IP65 is the floor and IP66 is the practical choice.
2. Tools and Materials You’ll Need
Get these before you climb the ladder. Missing one–more often than not, the right drill bit–adds 30 minutes and an aggravating drive back to the hardware store.
- A cordless drill with hammer function suitable for brick work, and a screwdriver bit kit.
- Use 3/16′ drill bits for brick, stucco, or concrete; Use 1/8′ wood bits for fascia or siding.
- M6 stainless steel wall anchors and socket screws for porch bushes, mild steel rusts in 2 seasons.
- Pencil, tape measure, spirit level. Useful to accurately mark pilot holes.
- Sturdy, weather-proof rated ladder to work at your working height plus 50% margin of safety.
- Safety glass and work gloves for over the head drilling.
- Outdoor rated cable clips- only necessary on split-panel models with exposed cable runs.
Most solar floodlights ship with the bracket and screws in the box. The wall anchors are usually generic- for marine or outdoor use- and worth replacing with stainless if your installation is a coastal or freeze-thaw climate.
3. Choosing the Best Mounting Location and Height
While not the only factor, the location of the mounting point will control two aspects of light performance that cannot otherwise be tuned: how much of the panel receives full sunlight, and how efficiently the wall-mounted fixture can illuminate the area underneath. Getting this wrong wastes electricity, copper, and the fixture itself. According to the CDSE Exterior Security Lighting Guide, the height at which a fixture is mounted will directly control the diameter of coverage- taller mounts will illuminate a wider area at a lower luminance, but the light will be less bright at the center point.
The U.S. Department of Energy Better Buildings exterior lighting guide has determined the following levels of horizontal illuminance as targets for residential pathways and parking surfaces based on IES (Illuminating Engineering Society) recommendations: 0.2 footcandles as the minimum horizontal illuminance for parking surfaces and 0.5–1.0 footcandles for residential walkways.
| Use Case | Mounting Height | Brightness Range | Coverage Diameter |
|---|---|---|---|
| Pathway / Garden | 6–8 ft | 600–1,500 lumens | 10–15 ft |
| Residential Security | 8–10 ft | 1,500–3,000 lumens | 20–30 ft |
| Driveway / Backyard | 10–12 ft | 2,500–4,000 lumens | 25–40 ft |
| Commercial Parking | 12–20 ft (pole) | 4,000–8,000 lumens | 40–60 ft |
| Building Façade Wash | 3–5 ft below the top edge | 1,500–3,000 lumens | N/A (uplight) |
How High Should Solar Flood Lights Be Mounted?
In most residential installations, mount solar flood lights at 8–10 feet for security applications and 6–8 feet for pathways. Higher mounts (10–12 ft) cover more ground but reduce illuminance at the edge of the beam — useful for driveways but excessive for a back patio. Mounting below 6 feet creates glare in the eye-line of anyone walking past. For commercial parking lots, IES recommends pole heights of 12–20 feet to keep illuminance uniform without hot-spotting beneath each fixture. Always confirm the housing is reachable from a ladder for battery replacement two to five years out — mounting too high to reach is the most common regret installers report.
📐 Engineering Note
Coverage diameter scales roughly with mounting height for downlight fixtures: a 10-ft mount with a 90° beam angle covers a circle ~20 ft in diameter at ground level. Doubling the height does not double useful illuminance — it spreads the same lumens over a larger area, so plan brightness accordingly.
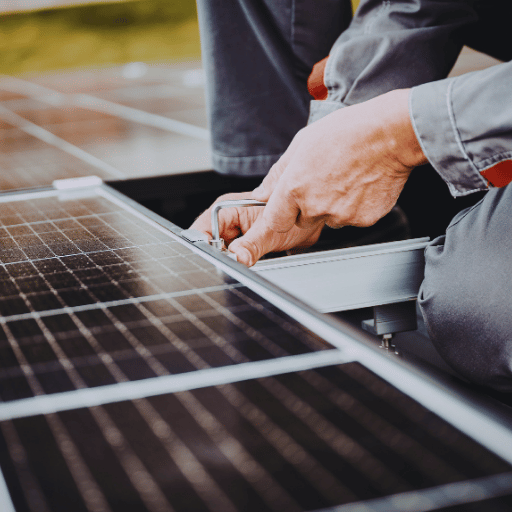
4. Step-by-Step: Mounting the Light Fixture
Once location and height are decided, mounting is mechanical. Work top-down: bracket first, then fixture.
- Mark the bracket position with a pencil while holding the bracket level against the wall. Mark every anchor hole — never trust two of three.
- Drill pilot holes. Use a 3/16″ masonry bit for brick or stucco; a 1/8″ wood bit for fascia. Drill at least 5 mm deeper than the anchor length so the anchor seats fully.
- Insert wall anchors. Tap them in flush with the surface; if the anchor spins free as you drill, the hole hit a stucco or drywall void — re-drill 50 mm to either side.
- Attach the mounting bracket with the supplied screws. Tighten to roughly hand-tight plus a quarter turn — 50–60 in-lb on M6. Over-tightening cracks plastic brackets.
- Hang or slide the floodlight onto the bracket per your model’s instructions. Most use a hook-and-screw or a slide-and-lock pattern.
- Aim the head by loosening the swivel screw, pointing the LED face at the area you want lit, and re-tightening. On pole-mounted fixtures, install the bracket on the pole first, then add the fixture.
⚠️ Common Install Mistake
Field installer’s number one cause of failure is screwing the bracket down before verifying the pilot-hole depth in the stucco – the screw spins in the void behind the wall and the fixture pulls away within a matter of weeks. Always test-fit the anchor with a finger prop before casting the screw home.
5. Positioning the Solar Panel for Maximum Charge
This single decision is by far the most important throughout the entire process. If a panel is angled wrong, it will under-source the battery by 30-60% – assure dim, short runtime nights weather notwithstanding.
The Latitude-Tilt Rule
Position your solar panel tilt to match your local latitude. To bias winter performance, add 15°; to bias summer performance, subtract 15°. This rule is the standard reference used by the NREL PVWatts technical methodology and matches the national average tilt distribution documented in NREL’s Rooftop Solar PV Technical Potential study.
One common oversight on residential installations is affixing the solar module directly against an exterior vertical wall. This equates to a 90° tilt – far steeper than any latitude in the US – and can net a 50% deficit of energy compared to mounting it properly. Use the swivel mount the manufacturer provides, or build a wedge bracket to tilt the panel at the correct angle.
| City | Latitude | Year-round Tilt | Winter Tilt (+15°) |
|---|---|---|---|
| Miami, FL | 25.8°N | 26° | 41° |
| Houston, TX | 29.8°N | 30° | 45° |
| Atlanta, GA | 33.7°N | 34° | 49° |
| Denver, CO | 39.7°N | 40° | 55° |
| Chicago, IL | 41.9°N | 42° | 57° |
| Seattle, WA | 47.6°N | 48° | 63° |
Orientation can be as critical as tilt. In the Northern Hemisphere, the panel must be facing due south (no more than ±15° deviation) for optimum full-day capture. Westward or eastward tilt cause reduced charging during either the morning or afternoon, resulting in reduced run-time compared to a due south panel of the same size. A free utility — the NREL “SOLPOS” calculator provides the precise solar position for any given site which is valuable when confirming if something is blocking the panel’s view of the sun at any time of day.
“Shadowing” effects can be deceptive and more serious than assumed. Even the slightest shading on a single cell can cause the entire array to shut down due to the bypass-diode configuration – not the moderate 30% speed reduction indicated in many guides, but a near-total drop in panel output. Perform a walk-around from dawn to dusk to ensure nothing, overhanging branches, eaves, swaying fences, even strategically-placed satellite dishes impose any shadow on the panel through the day.
6. Configuring the Motion Sensor and Light Modes
Most outdoor solar flood lights ship with three adjustable knobs on the PIR motion sensor: LUX (ambient light threshold), TIME (how long the light stays on after motion), and SENSITIVITY (how strongly the sensor reacts to motion). Factory defaults are tuned for general use — they are rarely the right setting for your specific install.
PIR Sensor Configuration Reference
- Detection range — typically 8–12 m (26–40 ft) at 180–240° horizontal angle.
- LUX setting — rotate counter-clockwise (sun icon) until the light only activates after dusk; a 5–50 lx threshold range is standard.
- TIME delay – 10s for high-traffic walkways, 30s for garden ambiance, 60s+ for security; “dusk-to-dawn” mode runs in dim mode without time delay.
- SENSITIVITY – high for security perimeter; medium for driveways; low if false-triggers by wind-blown foliage are an issue.
False triggers are the most common landscape fixture configuration problem. They tend to cluster around three causes: ambient temperature swings at sunset (the PIR reacts to heat radiation changes, not visible light), wind that shifts warm plants into the detection zone, and reflected heat from a sun-warmed wall behind the fixtures. Drop SENSITIVITY one notch lower and repeat, rather than believing the fixture to be defective. The Home Depot motion light adjustment guide documents the same three-knob walkthrough across most consumer fixtures, so settings are interchangeable.
For driveway fixtures, aim the sensor along the line of the oncoming traffic–PIRs detect motion crossing their field of view much better than motion coming straight at them. A car headed right toward the sensor will trigger later than a pedestrian strolling 20 ft past.
7. First-Time Charging and Testing
Solar flood light fixtures arrive with partly charged batteries, just enough to test if they turn on–but not enough to work as a security light. Fully charge the batteries by placing the solar panel in direct sun 24-72 hours before relying upon the fixture. Lithium batteries (LiFePO4 or Li-ion) require a full charge cycle to calibrate the battery management system; running them down before the initial calibration reduces long term capacities.
To test for functionality without waiting for sunset, block out the solar panel entirely using a thick towel or your hand. The light should turn on within five seconds (or trigger instantly if PIR is active). If the fixture does not power on, verify the on/off switch position – many units ship with switch set to OFF position. Many reports of “dead on arrival” are fixed by moving the switch to the ON position.
💡 Pro Tip
Sometimes all-in-one fixtures locate the photocell on the side of the fixture housing instead of the solar panel. Mounting that side away from the sun under an eave or in consistent shadow will cause the fixture to never determine it is dark and completely drain the batteries in eight hours. Make sure the photocell detects the same sky the panel is seeing.
8. Troubleshooting Common Installation Problems
Most problems once installed fall into one of six patterns. The matrix below displays symptom to most likely cause to solution- use it before concluding the fixture is broken.
| Symptom | Likely Cause | Fix |
|---|---|---|
| Light won’t turn on at all | On/off switch off, dead first-charge, faulty connector | Toggle switch, give 24h sunlight, reseat panel cable |
| Dim brightness or short runtime | Aged battery, dirty solar panel, partial shading | Wipe panel monthly with damp cloth, replace battery if >2 years old |
| Motion sensor doesn’t trigger | SENSITIVITY too low, LUX threshold off, sensor head obscured | Increase SENSITIVITY by one step, set LUX to night-only, clear debris from lens |
| False triggers throughout the night | Vegetation moving in wind, sun-warmed wall behind, animal traffic | Lower SENSITIVITY, reposition head 90°, trim back vegetation within 3 m |
| Light flickers or strobes | Battery near depletion, faulty driver, water in connector | Charge fully and re-test; if still flickering, contact the manufacturer under warranty |
| Light stays on all day | Photocell in shade, LUX dial at maximum, controller fault | Move photocell to direct sunlight, rotate LUX toward sun icon, reset by toggling on/off |
Why Is My Solar Flood Light Not Working After Installation?
Nine of ten “won’t turn on” complaints are attributable to one of three issues: the on/off switch was never actually moved from its position during package shipping, the battery has yet to receive its entire initial charge, or the cable connection between the solar panel and the light fixture (split-panel models) had not been seated until it clicked. Run the three tests before taking the light apart. If all three check out, cover the panel and verify that the light attempts to turn on; if the LED merely flashes on briefly then turns off, the battery is suspect, not the LED. Replacing the battery is a relatively simple screwdriver-level repair on serviceable models, though many integrated fixtures permanently seal the cell pack in position and use the entire fixture as the replacement option once the battery pack has failed.
9. Do You Need an Electrician? Safety, Permits, and Code
When using a pure all-in-one solar flood light, contractors and homeowners alike can skip any electrician and forego pulling a permit in most U.S. jurisdictions. Why? Because the entire system is DC at 6-24 V, that is, under 30 V independent from the code as per NEC Article 411 (Low-Voltage Lighting Systems). Local building codes typically only require permits for line-voltage (120 V or 240 V) wiring work. With no line-voltage involved, the install is treated like hanging a wall planter.
| Installation Type | DIY? | Electrician Needed? |
|---|---|---|
| All-in-one solar fixture (no wiring) | ✔ Yes | No |
| Split-panel solar (≤24 V DC cable) | ✔ Yes | No |
| Hybrid solar with 120 V backup charging | ⚠ Caution | Yes — for the AC side |
| Pole-mounted commercial above 12 ft | ⚠ Caution | Recommended for ladder safety + permit |
Can I Install a Floodlight Myself?
With a solar floodlight that has no AC wiring, yes — every step in this guide is within the skill range of anyone who can hang a curtain rod and use a cordless drill. Decisions that need outside help are non-electrical: pole installation above 12 ft (use a contractor with proper bucket-truck or scaffolding), and any masonry that requires a chase cut into structural brick. If your fixture is hybrid (solar plus 120 V grid backup), bring in a licensed electrician for the AC connection — that side does require permit and inspection in most jurisdictions, regardless of how easy the solar side looks.
10. What’s Changing in Solar Flood Lights Through 2026
Demand for solar flood lights is in active expansion. Market Report Analytics anticipates the global solar flood light market to reach roughly USD 8.6 billion by 2025 with a 7.1% CAGR, while the broader outdoor solar LED segment is forecast at a higher CAGR (27.7% through 2032 per Metastat Insight) as smart-city and energy-efficiency mandates push commercial procurement.
Three trends are worth planning around in 2026:
- Battery chemistry migration: LiFePO4 cells are displacing Ni-MH and Li-ion in mid-tier units. Expect replacement-battery cost to fall ~40% by 2027 as cell-pack production scales — a structural shift that will improve long-term optimal performance for any unit you install today.
- Brightness band shifting upward, with mainstream lumen output moving from 1,000–1,500 lumens toward 2,500–3,000 lumens as 7–10 W panels become standard. Buying a 1,200-lumen fixture in 2026 means accepting last-generation brightness for the same price as the new band.
- Smart and IoT features arriving at the mid-tier — multi-zone PIR with smartphone control, previously reserved for premium installations, is entering the $80–120 price band. Wiring a property today with future automation in mind means choosing models with app-pairing now to avoid a re-install.
Coastal and marine installations should specify IP67 or higher to keep the five-year service window realistic — IP65 still works inland, but salt air shortens connector life. To review current top-rated fixtures, see Best Solar Flood Lights of 2026.
Frequently Asked Questions
Q: What are the disadvantages of solar flood lights?
View Answer
Three real trade-offs worth weighing before installing: shorter runtime in winter when daylight hours drop, dependency on consistent panel orientation (a cloudy week can leave the battery under-charged), and replacement battery costs every 2–5 years depending on chemistry. None are deal-breakers — but they make hybrid and grid-tied LED flood lights still relevant for spaces that need 100% reliable nightly illumination regardless of weather.
Q: How do solar flood lights work in winter and on cloudy days?
View Answer
Winter and cloudy weather reduce daily charging by roughly 40–60% compared with full summer sun. A well-sized fixture (panel wattage 2.5–3× the LED draw) still operates four to six hours per night through cloudy stretches. To keep performance consistent year-round, set the panel tilt 15° steeper than your latitude (winter optimization) and clean the panel weekly during winter — frost and dust both block charging more in low-sun months.
Q: Where should I position the solar panel for maximum efficiency?
View Answer
In the Northern Hemisphere, the panel should face true south within ±15° at a tilt equal to your local latitude. Avoid mounting flat against a vertical wall — that geometry delivers about half the energy of a correctly tilted panel. Confirm nothing casts shadow on the panel during the day by walking the site at sunrise, noon, and sunset before final installation.
Q: How do I maintain my solar flood lights after installation?
View Answer
Wipe the solar panel with a damp cloth once a month — more often in dusty or pollen-heavy environments. Inspect connectors and cable runs every six months for water intrusion or animal damage. Plan to replace the rechargeable battery every 2 years for Ni-MH cells or every 5–7 years for LiFePO4 cells. Keep the PIR sensor lens clear of cobwebs and debris, which cause false triggers more often than any electrical fault.
Q: How do I connect the solar panel to the light fixture?
View Answer
On split-panel models, route the cable along an unobtrusive path (eave line, fence top) and secure with outdoor cable clips every 18–24 inches. Plug the connector into the light fixture port until it clicks — the click is what tells you the weather seal is fully engaged. Test by covering the panel and confirming the light activates. Most cables run 10–20 feet; longer runs cause measurable voltage drop and reduced charging efficiency.
Q: Can solar flood lights be installed on a fence or pole?
View Answer
Yes for both, with caveats. On wooden fences, choose a fence post (the structural vertical), not the rails — rails flex and loosen the bracket within a season. With poles, ensure the pole itself is anchored in concrete to a depth at least one-third its above-ground height. Pole-mount brackets typically use a U-bolt or band-clamp; check that the bracket fits your pole diameter before purchase.
About This Solar Flood Light Installation Guide
This information presents 14+ years experience in the manufacture of LED outdoor lighting from GQLAMP, citing technical sources from NREL (solar position algorithm), the US DOE exterior lighting documentation, IES recommended lighting practice, and GQLAMP field installation records from the 50+ countries we service. Reviewed by GQLAMP team of engineers.
References & Sources
- PVWatts Version 1 Technical Reference — National Renewable Energy Laboratory (NREL), U.S. Department of Energy
- Rooftop Solar Photovoltaic Technical Potential in the United States — National Renewable Energy Laboratory (NREL)
- SOLPOS Solar Position Calculator – NREL Measurement and Instrumentation Data Center
- Exterior Lighting for Energy Savings, Security, and Safety — U.S. Department of Energy, Better Buildings Solution Center
- Exterior Security Lighting Student Guide (PY109) — Center for Development of Security Excellence (CDSE)
- IEC 60529 Ingress Protection (IP) Rating Standard — International Electrotechnical Commission
- NFPA 70 (NEC) Article 411: Low-Voltage Lighting Systems — National Fire Protection Association
- Recommended Practice for Outdoor Lighting (RP-22) — Illuminating Engineering Society (IES)
Related Articles
- Solar Flood Lights: Specs, Types, and Installation Explained — companion overview covering selection criteria and product types
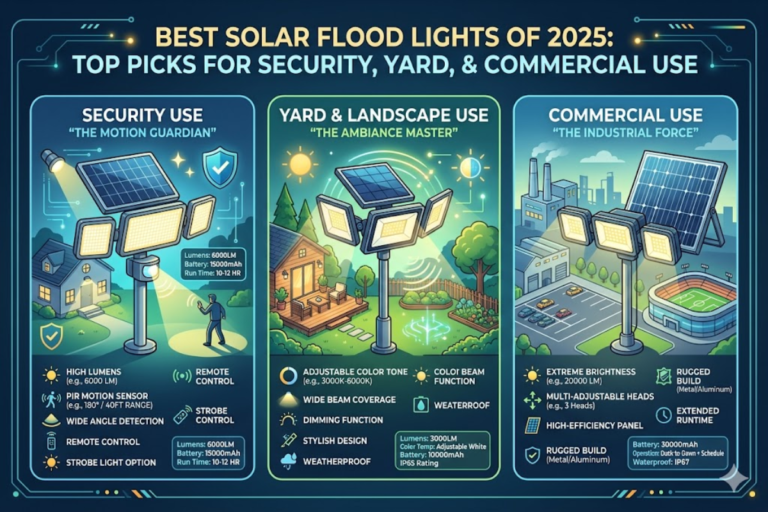
- Best Solar Flood Lights of 2026 — top picks for security, yard, and commercial use
- The Complete Guide to Swimming Pool Lights — types, selection, and installation
- What Are LED Pixel Lights? A Complete Guide to Addressable Architectural Lighting
- GQLAMP Solar Flood Lights Product Range — IP65/IP66 commercial-grade options
![Solar Flood Light vs Wired Complete Comparison [2026]](https://gqlamp.com/wp-content/uploads/2026/04/Solar-Flood-Light-vs-Wired-Complete-Comparison-2026-768x512.png)
![Solar Flood Lights Specs, Types, and Installation Explained [2026]](https://gqlamp.com/wp-content/uploads/2026/04/Solar-Flood-Lights-Specs-Types-and-Installation-Explained-2026-768x512.png)