
Get in Touch with GUANGQI


Landscape Lighting Design: From Layering Principles to Pro Techniques
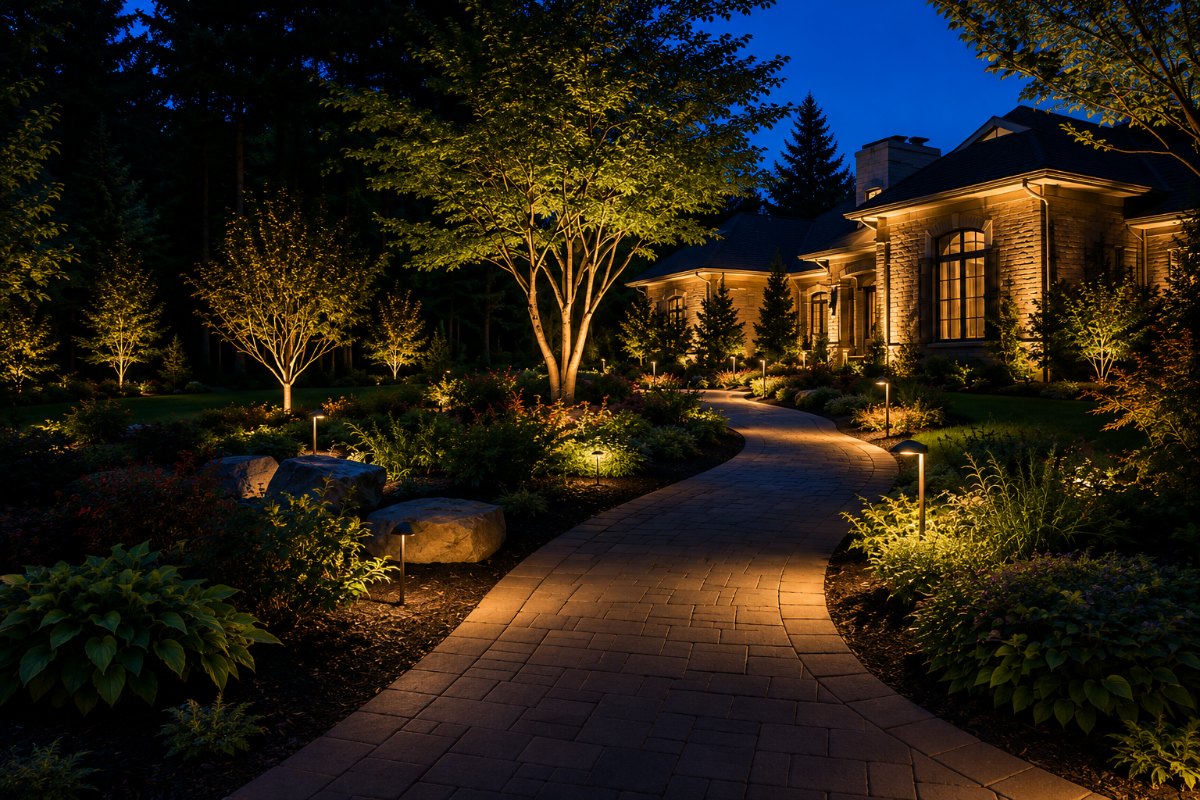
Effective landscape lighting design is not a matter of increasing the number of fixtures but selecting proper beam spread, color temperature and spacing to achieve subtle, interesting lighting of a property after dark. Properly designed light can complement architecture, help visitors meander through a site, and extend the living space of the indoors into the outdoors; ill-designed light can wash the site out with—like—an airport runway-strip glow.
In this guide I have outlined: 5 functional categories of outdoor lighting, the layer principle that differentiates a designer from average job, all 8 named lighting techniques should be intimate knowledge of any designer, the 5 standard fixtures you will need to select, the 7 step planning process, the 7 most commonly encountered errors, and a decision making order matrix that will help you assess whether to go the DIY kit, hire a designer or specify direct from a manufacturer.
Quick Specs — Landscape Lighting Design at a Glance
| What it is | Designing outdoor electric illumination for gardens, walkways, hardscape, and architectural exteriors |
| Core principles | Layered design (foreground / midground / background) + warm color temperature 2700–3000 K + glare-free aiming |
| Common voltage | 12 V or 24 V low-voltage (DC), supplied by a 120 V→12/24 V step-down transformer |
| Eight named techniques | Uplighting, downlighting, grazing, wall washing, silhouetting, shadowing, moonlighting, cross-lighting |
| Standard fixture types | Path lights, well lights, spotlights, flood lights, step lights, underwater lights, wall washers, hanging lanterns |
| Key standards | ANSI/IES RP-47-23 Recommended Practice: Landscape Lighting; DarkSky Approved luminaire guidelines; IP65/IP66 ingress protection; CE / RoHS |
What Is Landscape Lighting Design?
Landscape lighting design involves the planning, specifying, and installation of external electric light fixtures that makes the home functional, safe, and artistically layered at night. Landscape lighting includes gardens, lawns, hardscape (patios, retaining walls, water features), pathways and driveways and the architectural elevations of the buildings—balanced composition, as opposed to flat illumination every where.
Basic misperception: outdoor lighting is simply “indoor lighting that lives outside. ” Certainly, most of the fixtures are low-voltage (12 V or 24 V), weatherproof (IP65 or higher) luminaires with targeted beam control. But there is also a whole other intent: to influence our understanding of depth among three layers—the land, the structures, and the landscapethey are all a part of. An accepted industry reference is ANSI/IES RP-47-23 Recommended Practice: Landscape Lighting, published by the Illuminating Engineering Society.
This document captures our design reasonings, recommended levels of illumination, and criteria for quality.
📐 Engineering Note
Published ANSI/IES RP-47-23 not only discusses lumen targets but also light trespass, uplight emission, CRI, and suggested colour temperatures for both residential and commercial applications, and within dark-sky protected areas. Lighting designers will often also consult the Five Principles for Responsible Outdoor Lighting in the category of projects falling within DarkSky-protected areas.
The Five Core Functions of Outdoor Lighting
Often, beginner guides to outdoor lighting confuse things by classing all exterior fixtures into three types—ambient, task, and accent. While that’s a helpful conceptual model, it omits distinctions made by most practical taxonomies—there are at least five basic types of outdoor lighting in a well-designed system, since the required lumen levels, beam specifications, and fixture types vary noticeably between safety lighting and security lighting, and between ambient and task lighting.
- Paths, walks, and driveway edges: is part of safety. The Illuminating Engineering Society guidelines advocates a maintained 0.5-2 footcandles for home walkway safety using low- output path lights placed6-8 feet apart.
- Security lighting includes perimeter zones, garage doors and side yards. These are sometimes activated by motion detectors and are much higher intensity than safety lighting; full cutoff floodlights prevent bleed to neighbors’ property or the night sky.
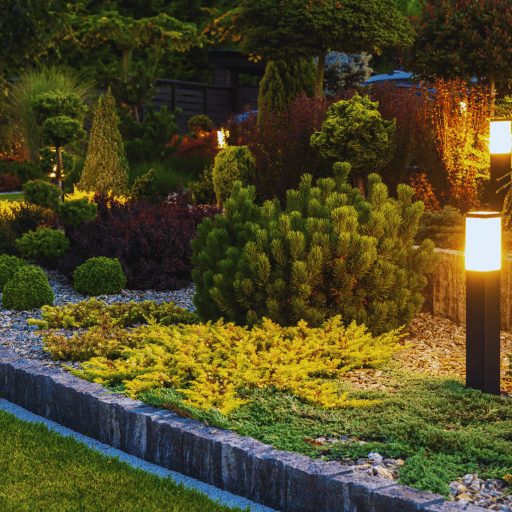
- Accent lighting is used on focal trees, statues, water features, and architectural details. Areas are often lighted with narrow-beam spotlights or discreet well lights. Result: selective drama, not even illumination.
- Outdoor living areas, patios, deck areas and gathering places use ambient lighting. Such lighting is semi—dim, broader dispersal; it is frequently suspended—using, for instance, lanterns or string lights—from above.
- Task lighting for outdoor kitchen, grills, prep stations, reading nook, candle lights, and lighter jets..a higher output, focused beam, and CRI 90+ for true representation of food and material colors.
Most of the better planning achieved these three to four functions in one layout, with intentional luminance ratios between zones (described below). Per the ENERGY STAR outdoor lighting guidance, an LED outdoor luminaire in the large lumen ranges provides identical amount of lumen at about one third the wattage as legacy halogen, thus layered layout is much more economical to run over time.
The Layering Principle: The 3:1:1 Ratio Rule
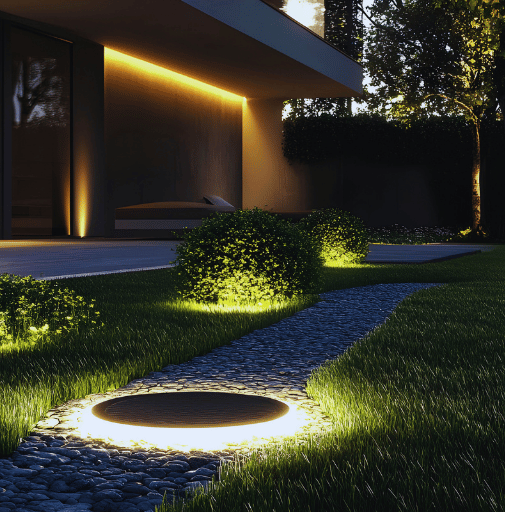
Proposals which add fixtures without concern for plan depth will look flat at night. A professional way is to design three layers of plane — foreground, middle ground and background, and plan different light levels and methods for each layer.
- Foregrund (0-10 ft væk fra betragteren): sti-lys, trappelys, lavt skrive. Lumen mål: 50-200 lumen/armatur, normalt ved 1-3 W LED.
- Midground (10-30 ft away from viewer): the primary level of interest (one lit specimen tree, one lit fountain, or lit statue). Lumen target: 200-600 lumens per accent fixture.
- Background (30+ ft from viewer): silhouetted barrier, far off facade wash, soft canopy moonlight. Lumen goal: 50-300 lumens, intentionally lower than midground.
⭐ The 3:1:1 Ratio Rule
Accent (focal) zones should sit at roughly 3× the brightness of the ambient layer; security and safety zones should track 1:1 with ambient. This ratio is what guides the eye to the focal layer first, so the property reads as a designed composition rather than a runway. Color temperature must stay unified across all three planes — choose either 2700 K (warm) for residential or 3000 K (neutral-warm) for commercial, and never mix 2700 K with 4000 K bulbs in the same sightline.
Practitioners in the industry generally observe that professional landscape lighting design is made up of pockets of light rather than evenly spaced illumination. Commonwealth Landscape Lighting designer Mark Piantedosi therefore advises that fixtures not be placed within about 20 ft of each other on one sight line; closer spacing produces a flattened ribbon of uniform illumination.
Eight Core Landscape Lighting Techniques
To install the layered plan a nomenclature must be adopted. Each fixture is given a named technique. Once, the names are learned, the eight techniques are the designer’s lexicon – learning when to use each one is the essence of lighting design.
1. Uplighting
Uplight fixture, mounted at or below ground level, beam centered at a vertical object (such as a tree trunk). An ideal lighting solution for trees with sculptural leaf canopies, columns, statues, or architectural pillars. Typical uplighting application us narrow-beam well lights (15-45 deg beam angle) for the trunk and a wider spot for the canopy.
2. Downlighting
High mounted – on building eaves, the under side of an architectural soffit, on a tree branch so that the beam shoots downward. In the canopy trees, when focused through branches, the dappled effect is similar to moonlight and this is the basis of moonlighting.
3. Grazing
Located 6-12 inches away from a textured vertical surface (stone wall, brick facade, well-aged tree-bark), with the beam grazing across this surface at a very slight angle. Shallower incidence, the more you can see all the shadows and textures, which makes grazing much more reliable on masonry walls, bark-textured trees, and rusticated stone columns.
4. Wall Washing
Wall wash fixture- positioned 1-2ft from a flat vertical surface with a wider beam angle (60-90 degree). diffused light, as opposed to grazing, flatens a surface & creates even glow- suitable for smooth, modern elevations, faces & signage.
5. Silhouetting
Backlight. Fixture located behind the subject and directed at background wall or hedge. This converts the subject into a shadowed silhouette against a luminous surface which, when used with sculpturally appealing vegetation like Japanese maples, grasses, and small flowering trees with unique shapes – very effective.
6. Shadowing
Lights in front of the subject and directed at the wall behind, creating a shadow of the subject as part of the composition. Shadow becomes the work of art- would be excellent for gentle branching plants, lattice and fancy ironwork.
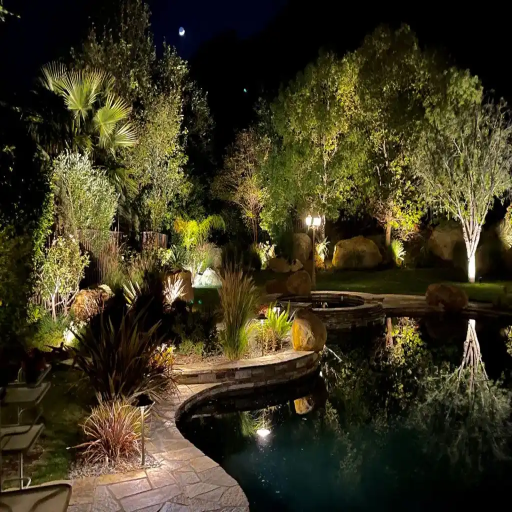
7. Moonlighting
Moonlighting:This type of broadcanopy trees with or without low undergrowth carry high mounted fixtures pointing through the crown for a filtered dappled pattern on the ground below. Is what would be seen on a clear evening on open land from the light of the moon. This is the softer, more romantic and most photographed effect in residential landscape lighting.
8. Cross-Lighting
2 fixtures, positioned on opposite sides of focal object and both pointed ‘inward’. Broken beam creates softer shadow gradient on focal object (compared to a parallel beam) and more even 3-D rendering—all conventional practices in sculptures, ornamental feature fountains, and display specimen trees that will be viewed from multiple angles in walk-by mode.
Fixture Types: A Practical Buyer’s Map
It turns out that each of these techniques correspond to one or two common fixture types, and these eight general categories of lamp types account for virtually every design project for residential and commercial landscape lighting, and selecting the appropriate category is important to applying the technique correctly.
| Fixture | Form Factor | Typical Beam Angle | Best For | IP Rating |
|---|---|---|---|---|
| Path light | Hat-style stake, 18–24 in. height | 60–120° downcast | Walkways, driveway edges, garden bed perimeters | IP65 |
| Well light (inground uplight) | Recessed flush in ground | 15–45° narrow | Tree uplighting, column wash, hidden source uplighting | IP67–IP68 |
| Spotlight (bullet) | Adjustable bullet on stake or surface mount | 15–60° narrow to medium | Accent trees, statues, focal architectural features | IP65 |
| Flood light | Wide-throw, knuckle or yoke mount | 60–120° wide | Facade wash, security perimeters, large area coverage | IP65 |
| Step light | Recessed in stair riser or retaining wall | 90° downcast asymmetric | Stairs, retaining walls, deck edges | IP65 |
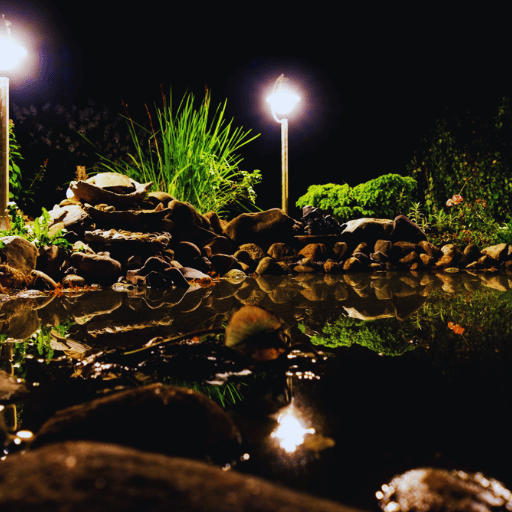
| Underwater light | Submersible | 45–90° | Pools, fountains, ponds, koi gardens | IP68 |
| Wall washer / linear bar | Linear strip or bar | 30–60° asymmetric | Facade wash, signage, modern flat surfaces | IP65–IP66 |
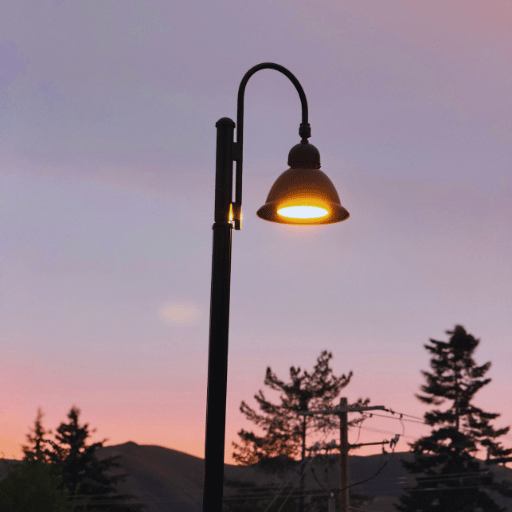
| Hanging lantern | Pendant from pergola or porch | Omnidirectional | Pergolas, gazebos, entry porches, outdoor dining | IP44+ |
For larger commercial projects where photometric calculations and DarkSky-compliant fixtures are a concern for code or specification, factory direct sourcing through a manufacturer such as CX’s commercial landscape lighting design service provides IES file delivery, BUG-rated fixtures and IP66-rated bodies as the norm. For small residential projects under 30 fixtures, retail kits or niche boutique brands are usually the logical starting point.
The Seven-Step Landscape Lighting Design Process
Here is the seven-step workflow of what most professional landscape lighting designers follow, made simpler for designers and contractors to understand, and for property owners who are eager to learn more before they start selecting fixtures.
- Stroll around the place at sunset – this is the dusk site audit. Identify, three key things: points of natural interest ( specimen tree, structural feature, water feature); the dark areas which have the potential to cause a safety issue (steps, level changes, gates); the place your eye goes to first when you enter.
- Set functional goals for each zone. Select the dominant function of each zone from the above five-function model—safety, security, accent, ambient or task. A zone can have a secondary function but it must definitely have one dominant function.
- Choose at least three focal points. Any given property will have at most one focal point per big sight-line(front door, back porch, pool deck). Avoid the trap of lighting everything; a focal layer needs to be selective to register.
- Create foreground/midground/background. Follow the 3:1:1 ratio rule. Maintain a constant color temperature through out the project at 2700 K residential or 3000 K commercial – don’t mix.
- Match technique to fixture. Choose a named technique(flooding, grazing, silhouetting, etc.) for each lit component, then select the fixture category that provides it. Statues are conventional crosslit with two narrow spots; textured stone walls are grazed with a wall-washer from 6-12 inches off the wall.
- Design power and wiring. Typical low-voltage residential layouts use either 12 V or 24 V energized by a 120 V12/24 V transformer. Select a transformer that is roughly 80% of the wattage total in fixture watts to leave headroom. Use the formula (2 cable length in ft total fixture wattage) (cable circular mils average voltage) to determine voltage drop on long runs – ideally, total drop would be under 10% (install 1.2 V on a12 V system). For runs 50 ft or more, the “hub method” is one way of addressing this: 10 gauge cable from the transformer to a water-proof connection box, with 12 gauge branches of equal length to each fixture.
- Program the system. Install at least a timer and a photocell but for premium clients, consider integrating Wi-Fi or Zigbee scene control so that the property can have a sunset scene, an evening scene, and a security scene.
If you’re seeking official training in this specialty, the International Landscape Lighting Institute offers multi-day intensive programs on this exact flow plus additional modules on transformer computation, voltage-drop calculation, and scene programming.
Seven Common Landscape Lighting Design Mistakes
Most landscape lighting failures tend to happen in similar ways. Below are seven common mistakes that experienced designers often encounter when making repairs:
- Overlighting the property: flooding every corner of every structure, flood-lighting every plant bed, and placing accent-lighting on every bush. Stagnant brightness with no focal hierarchy results in a lit but not designed effect.
- Inconsistent color temperature: combining 2700 K with 4000 K bulbs in the same view creates visual confusion to the eye. Select one color temperature and source all lamps in one order.
- Disregard for the principles of layering: a bright flood across the entire front of the house obliterates depth and smooths the silhouette of plants in front. Without foreground / midground / background hierarchy, the property takes on a flat, two dimensional look.
- Glare into viewers’ faces: fixtures are aimed directly into sight lines from doorways, window seats, or seating areas. Reduce hazards with cowls or shields on bullet lights, swap in lower output lamps (between 1-3W LED is usually adequate), or relocate fixtures to be water- or land-scape-hidden.
- Voltage drop on long runs: subsequent fixtures emit less light than the first fixtures. A simple method of attenuation is the hub method as explained in 6 above.
- DarkSky violations from unshielded uplight: according to DarkSky Approved luminaire criteria, fixtures shall not have more than a total of 1,000 lumens output, and no more than 50 lumens shall escape out the top (between 90 and 180). Best solution: full-cutoff fixtures and tighter beam angles.
- Thinking in wattage: spec’ing 35-50 W LED fixtures because that was always the standards in the halogen era. Today, LED fixtures achieve the same lumen output at roughly one-third the wattage of legacy halogen lamps. Over-spec is wasted brightness and glare.
A helpful rule of thumb: at the planning table, ask every fixture: does it serve a fivefold function, rest in a specific layer, apply a named technique, and abide by DarkSky principles? Only keep fixtures that can answer yes to all four.
From Plan to Sourcing: DIY, Designer, or Direct Manufacturer
After establishing the design plan, the second critical decision is where to source the fixtures. A three-level matrix below will help you match project scale and complexity to the ideal sourcing channel.
DIY Kit
4–8 fixtures, residential, no permit required, budget under $1,500.
Retail kits contain all components: transformer, wire, and identical fixtures. Suitable for pathway lighting plus a few uplights.
Hire a Designer
10-30 fixtures, customized for residential application, pricing includes design fee usually around 10-15 percent of fixture cost.
A landscape lighting designer will determine photometric layout, fixture transformer size, estimate voltage-drop, and perform aim-and-tune on site.
Direct Manufacturer Specification
50 or more fixtures, for large commercial, institutional or hospitality project, requirements include photometric files.
Direct-from-manufacturer specifications provided, delivered IES files, and DarkSky-friendly luminaires with durable in-ground IP66 housings.
To meet the criteria of a wholesale-led project requiring photometric files, BUG-zone DarkSky adherence, and CE / RoHS / IP66 lights delivered factory-direct from a Grade A manufacturer, see Guangqi’s commercial landscape lighting design service. Our team at Guangqi have been designing and manufacturing LED outdoor and architectural lights since 2010 with over 50 installations worldwide and fully integrated in-house R & D, design, optics, and driver facilities.
Frequently Asked Questions
Q: How do I create a landscape lighting plan?
View Answer
Stroll the site at dusk and note key features, dark pockets and natural sight lines. Allocate each area a function from the five-function vocabulary (safety/security/accents/ambience/task). Select one focal point for each major sightline, arrange luminaires across foreground / middle ground / background—use the 3:1:1 proportion rule—set color temperature at 2700K residential or 3000K commercial, then determine transformer size and voltage drop in the hub method.
Q: What is the 5′7″ lighting rule?
View Answer
The 57 rule provides a path lighting insitute for spacing on residential walkways: install fixtures 5-7 feet apart along meandering walkways and 6-8 feet apart along straight stretches, trying to alternate sides when possible. The aim: create overlapping circles of illumination at ankle-level—no continuous bright spot.
Q: How many lumens do I need for outdoor lighting?
View Answer
Targeted lumen output dependant upon function: path lighting 50-200 per fixture. Accent uplights on trees and statues, 200-600 lumens. Step lights, 50-100 lumens. Security or facade floodlights 700-1,300 lumens. Having no more than 1,000 lumens total per light fixture and no more than 50 lumens illuminating out from the top (angle less than 180 degrees) prevents glare and skyglow. Lead conservatively by starting lower. Then you can upgrade bulbs; you cannot undo glare.
Q: What is the difference between a daisy chain and the T-method for wiring?
View Answer
A daisy chain connects the cable from the transformer to a fixture, then from that fixture to the next (etc). Every fixture consumes some of the voltage supplied to it, so the last fixture in the string receives less power than the first, resulting in dimmeras end-of-run lights. The T method splits the run in the middle to create two equal branches providing about half the fixtures each, creating a more balanced voltage. Hub method goes a step further: a 10 gauge home run feeds an environmentally sealed junction box providing power for an equal-length branch of 12 gauge cable feeding each fixture (the most consistent overall color variation with long cable runs).
Q: Can I install landscape lighting myself?
View Answer
Approved for low-voltage 12 V or 24 V systems – all are reference designs for home projects. A 120 V line-voltage connection at the transformer often needs a licensed electrician, GFCI-protected outdoor outlet. Burying cable less than 6 inches deep and waterproofing every junction are the two weakest points of DIY systems.
References & Sources
- ANSI/IES RP-47-23 Recommended Practice: Landscape Lighting — Illuminating Engineering Society Lighting Library
- Five Principles for Responsible Outdoor Lighting — DarkSky International
- DarkSky Approved Luminaires Guidelines – DarkSky International
- International Landscape Lighting Institute — industry training body
- ENERGY STAR Certified Outdoor Lighting – U.S. Environmental Protection Agency
- Everything You Need to Know About Landscape Lighting — This Old House
Related Articles
- The Complete Guide to Swimming Pool Lights — underwater fixture selection for water features in landscape lighting plans
- Solar Flood Lights: Specs, Types, and Installation Explained — off-grid alternative for security and perimeter zones
- LED Pool Light Replacement: Cost, Compatibility & DIY Guide — retrofit guidance for existing pool installations
- Best Solar Flood Lights of 2026 — product round-up for security-zone applications
About This Landscape Lighting Design Guide
This article was researched and written by the Guangqi Lighting engineering team with 14+ years professional experience designing, manufacturing, testing LED outdoor, architectural, and landscape lighting in over 50 countries. All recommendations are confirmed with ANSI/IES RP-47-23 Recommended Practice: Landscape Lighting, DarkSky International Five Principles, and ENERGY STAR Certified Outdoor Lighting guidelines. Email us for project-specific photometric plots, CE / RoHS / IP66 FI certified commercial fixtures.